
Everything you need to run FICAVault with confidence.
Step-by-step guidance for individuals, businesses and accountable institutions — covering signup, document requests, OTP consent, the audit trail, and how your data stays private by default.
1. Welcome to FICAVault
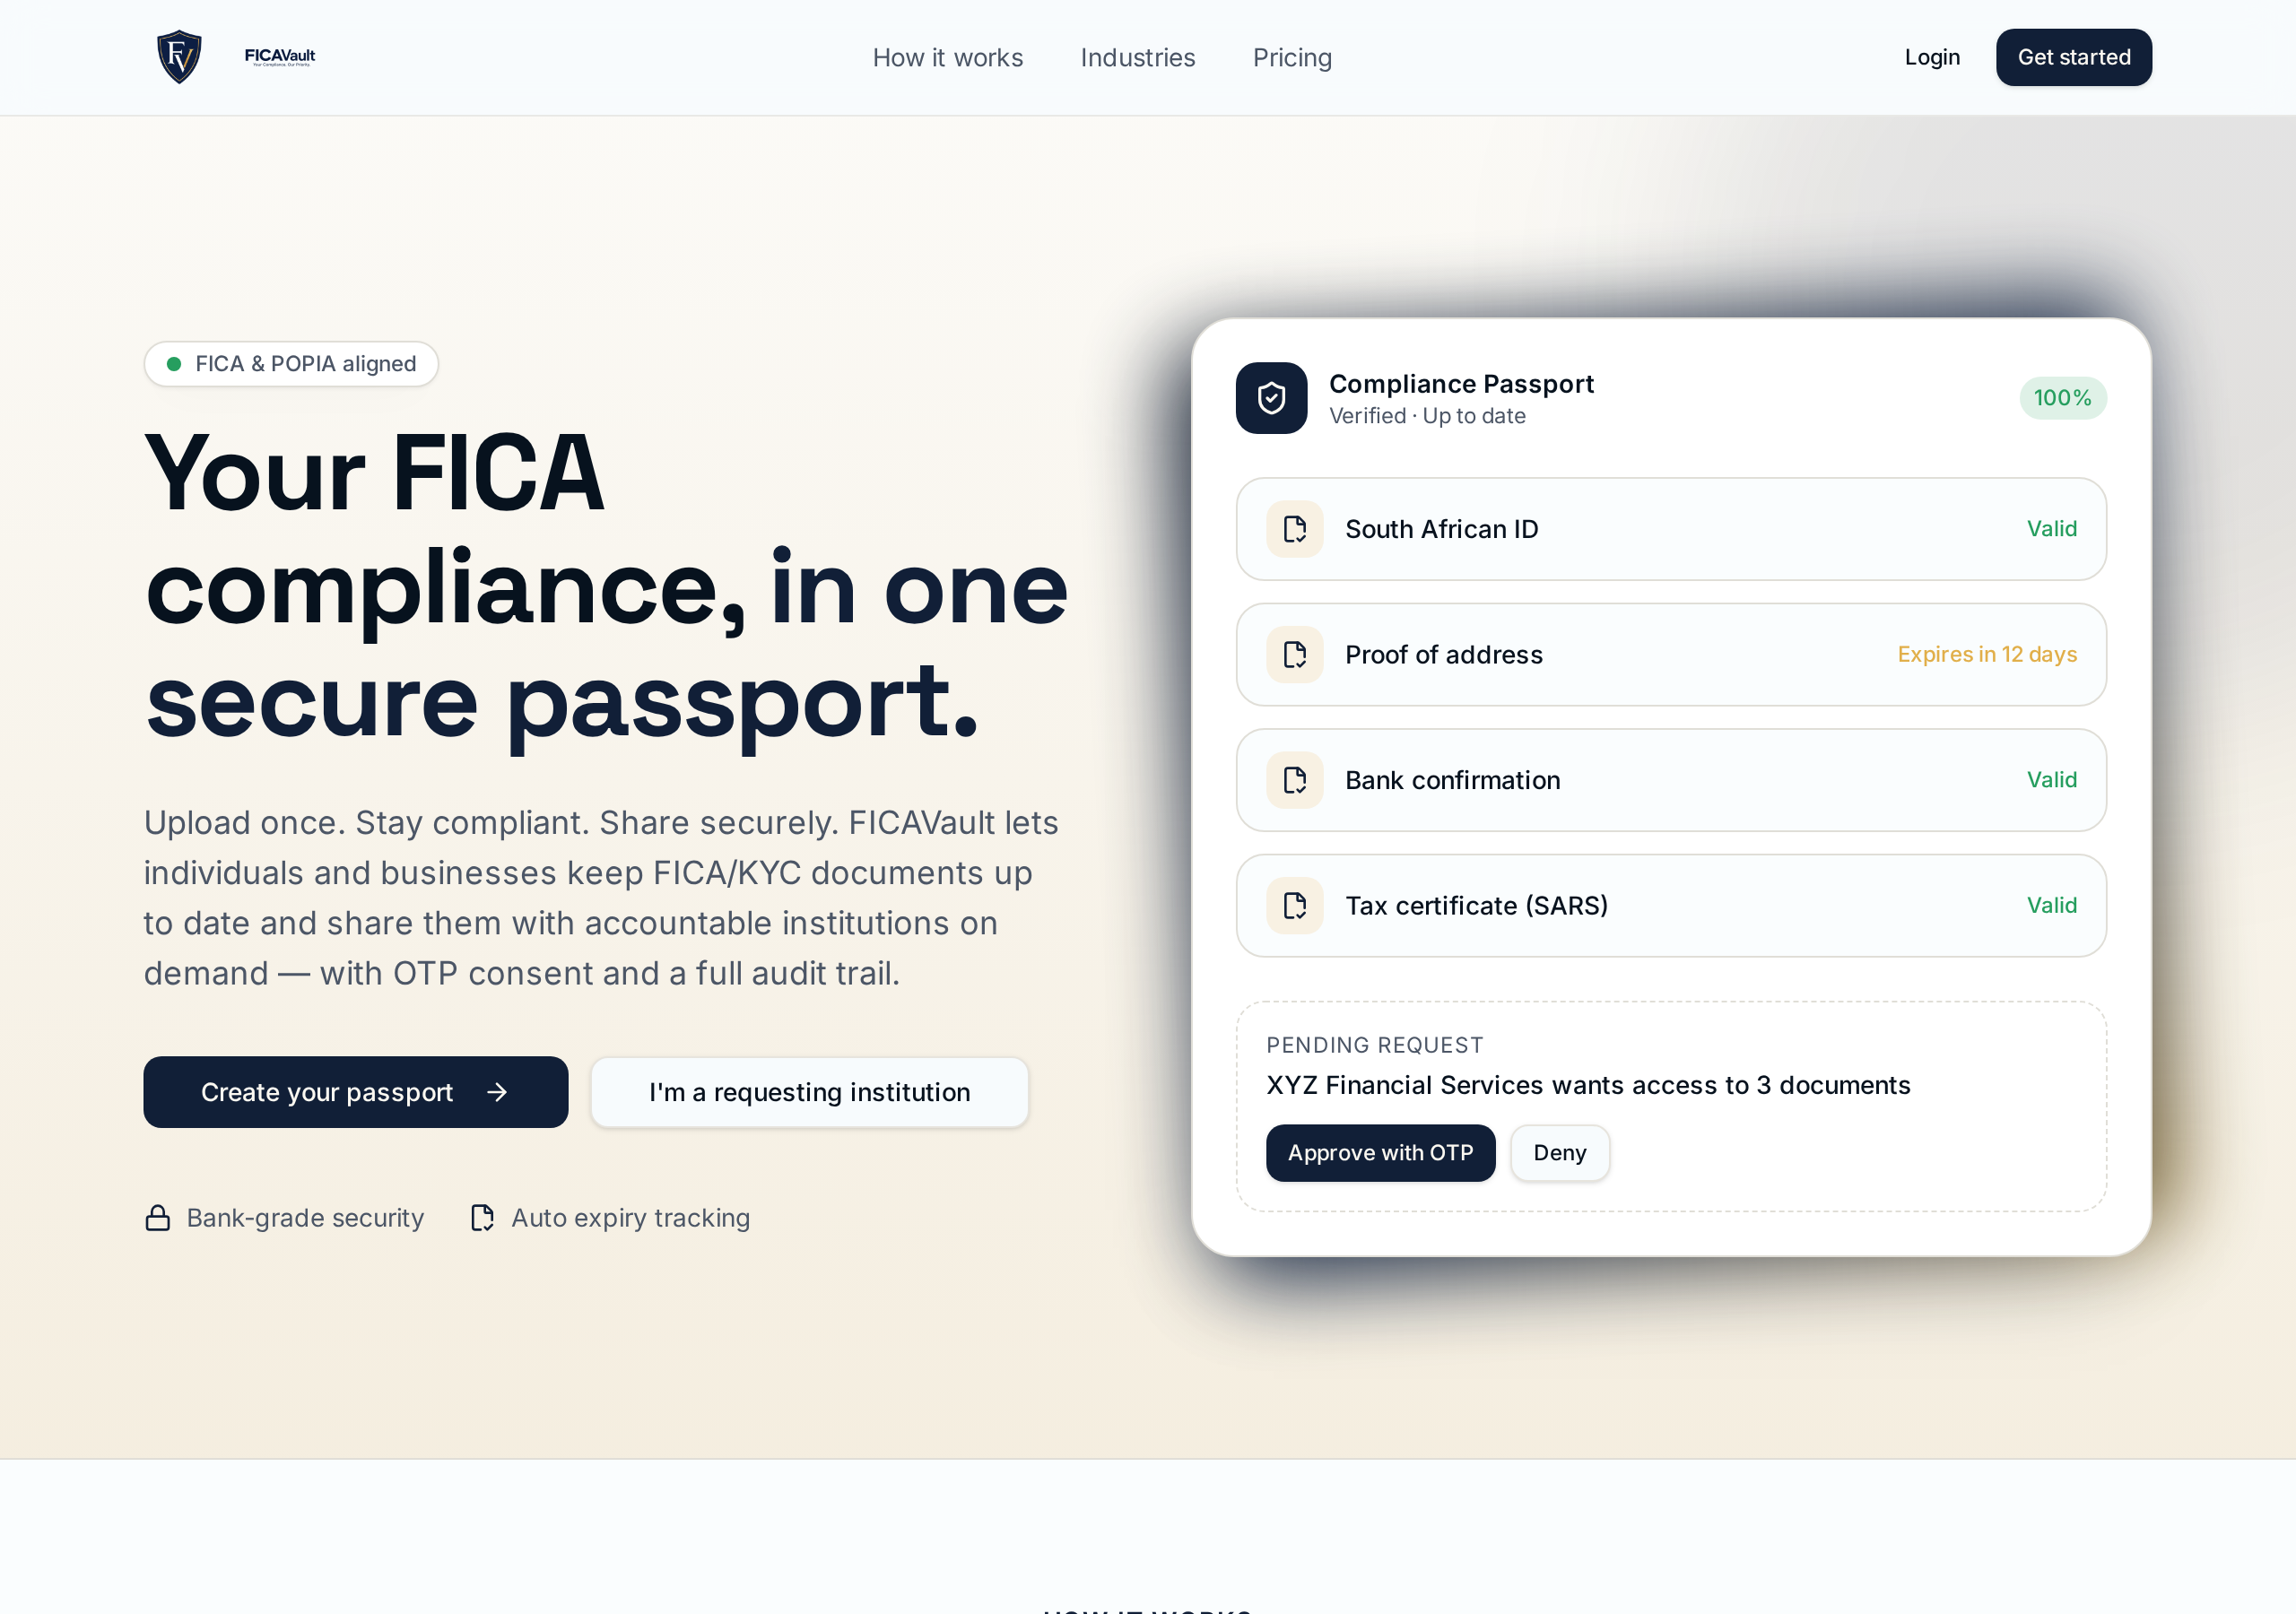
FICAVault is a compliance passport for South African individuals and businesses. Upload your FICA/KYC documents once, keep them current with automatic expiry reminders, and share them securely with banks, advisors, attorneys, accountants, brokers and other accountable institutions only when you explicitly approve the request.
2. Key concepts
- Passport. The set of documents that make up your (or your entity's) up-to-date compliance profile.
- Requesting institution. A bank, advisor, attorney, accountant, broker, dealership or asset manager that needs to see specific documents to comply with the FIC Act.
- OTP consent. A one-time password sent to your verified email or mobile that must be entered to approve a share.
- Share link. A signed, time-limited URL you generate to disclose specific documents to a named recipient.
- Audit log. An immutable, time-stamped record of every request, approval, denial, download and revocation.
3. Choosing your account type
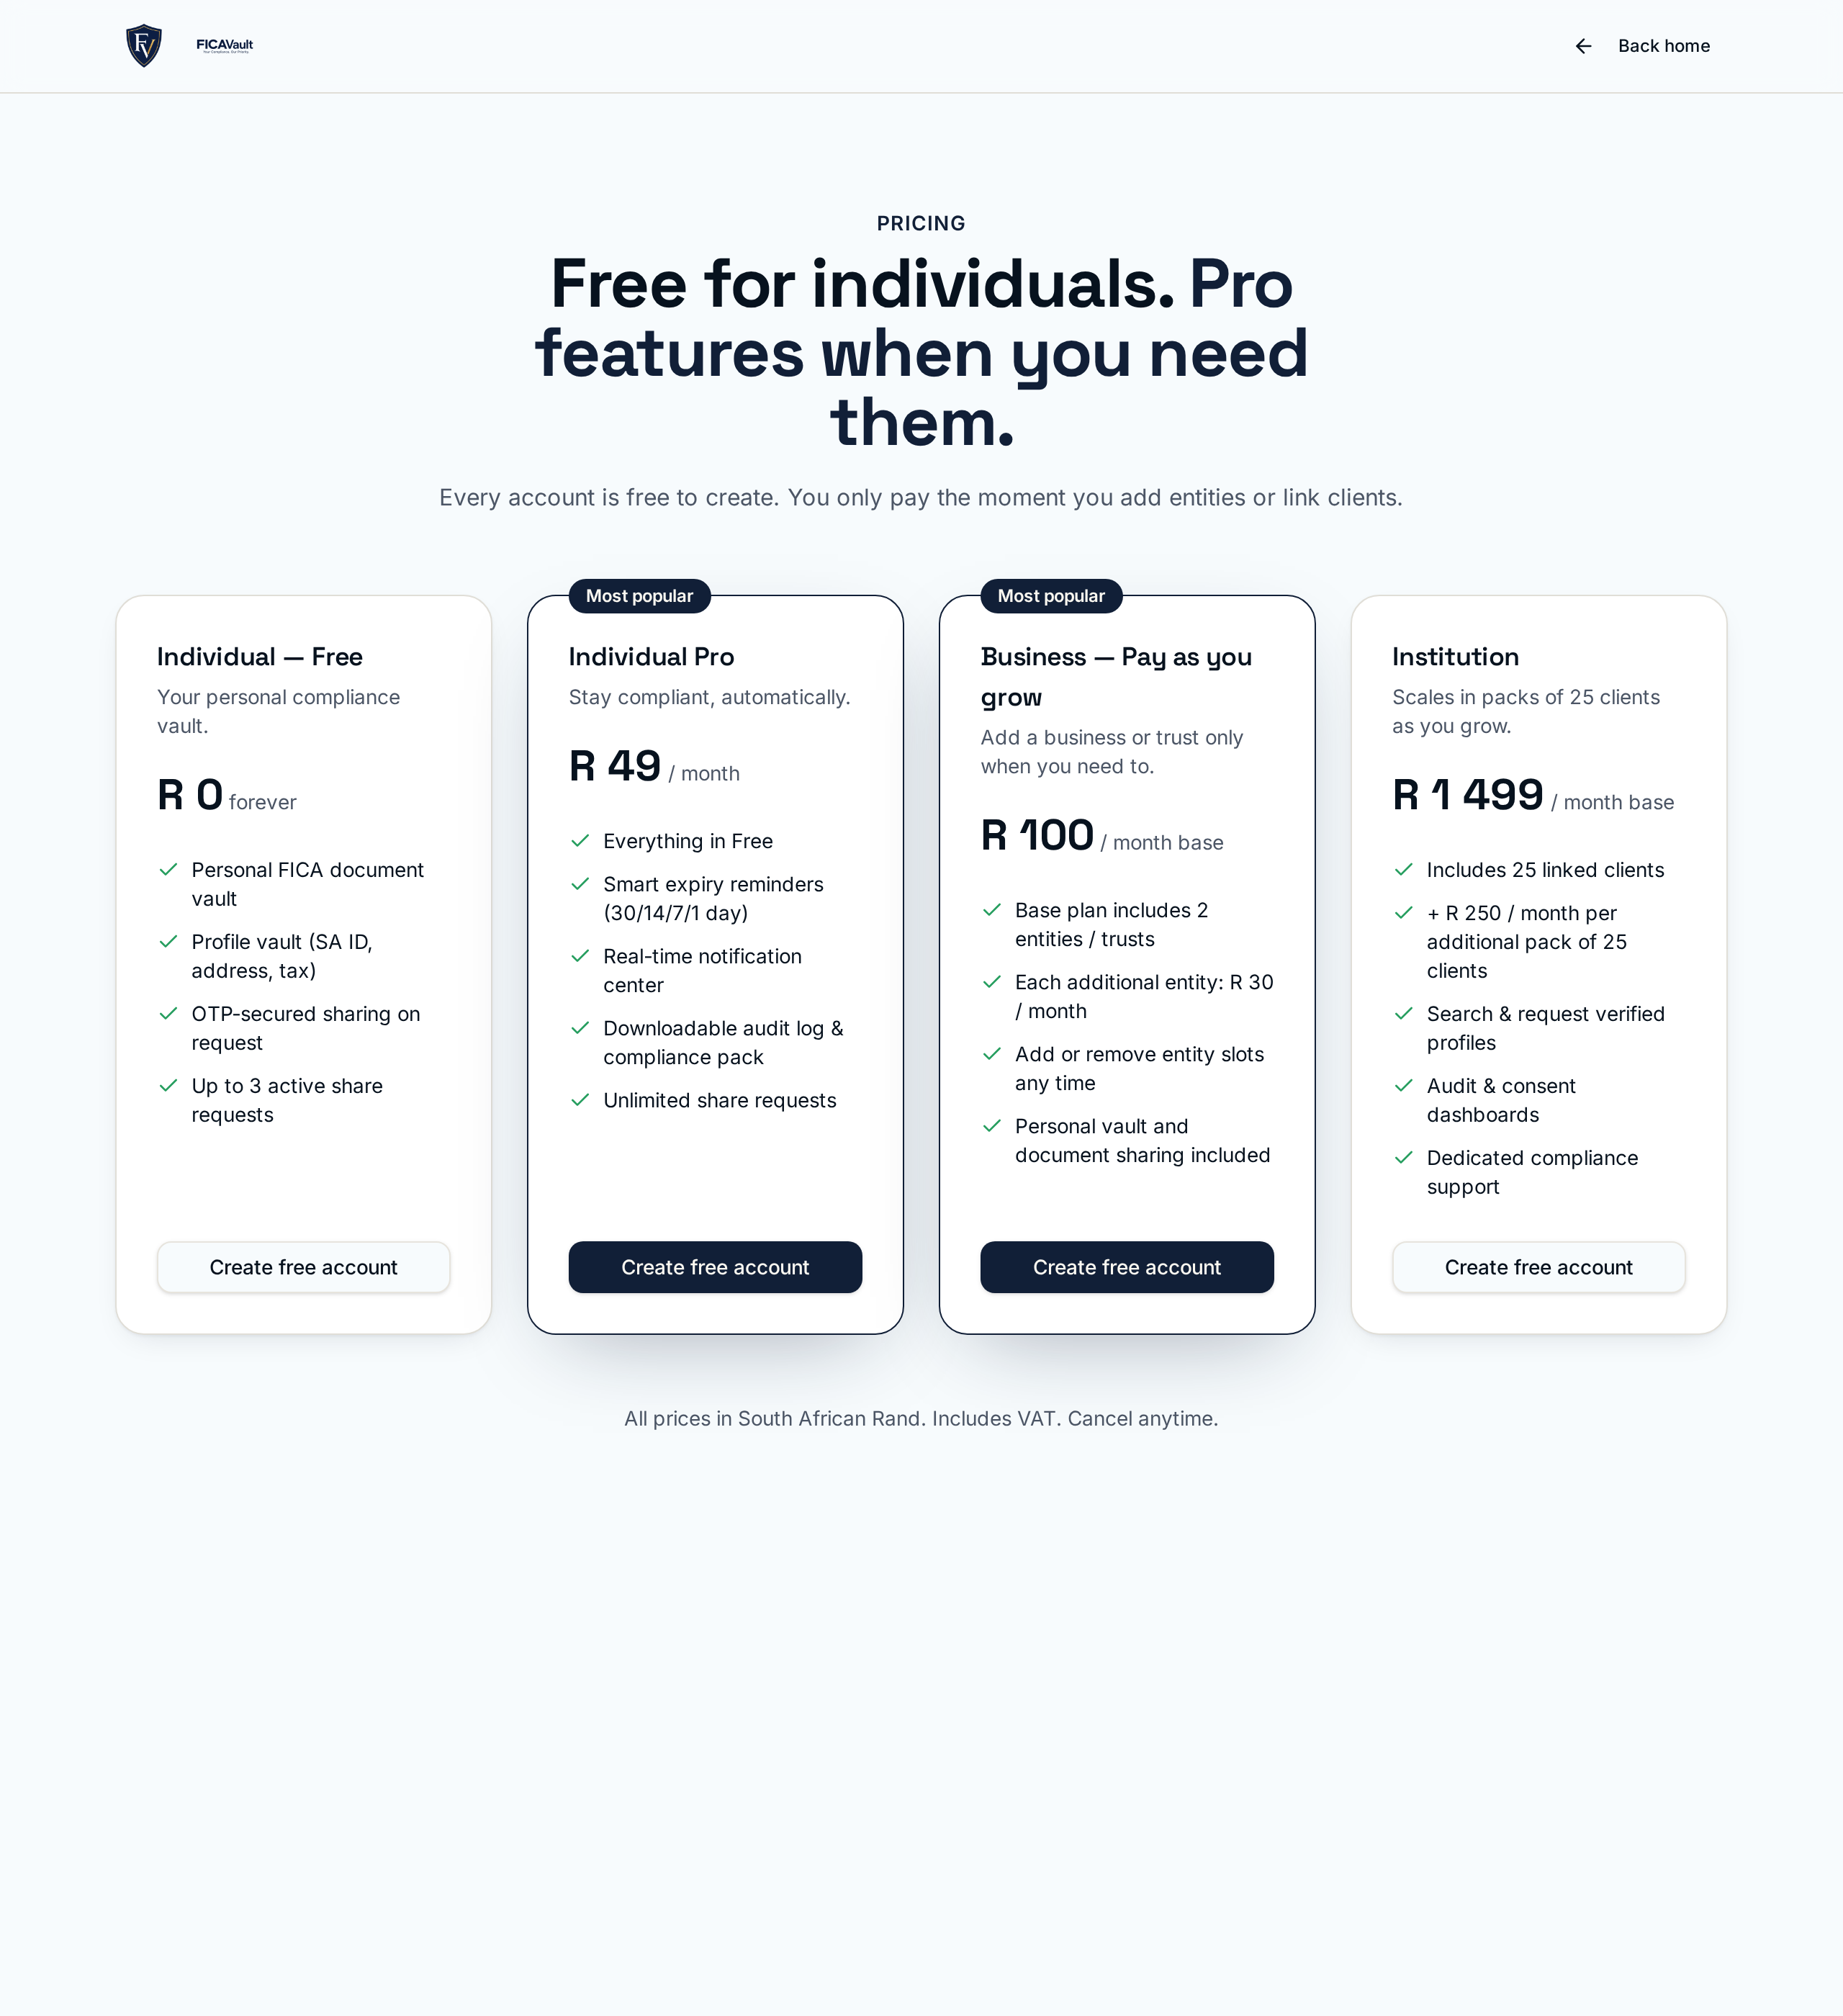
Every account is free to create. You only pay when you add a business, trust or linked client.
| Type | Best for | Pricing |
|---|---|---|
| Individual | One person building a personal FICA passport. | Free forever. Pro adds notifications & audit export at R 49 / month. |
| Business | Companies, close corporations and trusts with directors and beneficial owners. | Free to explore. R 100 / month unlocks 2 entities, +R 30 per extra entity. |
| Institution | Banks, advisors, attorneys, accountants and other accountable institutions. | Free to explore. R 1 499 / month covers 25 linked clients, +R 250 per extra 25. |
4. How to sign up
Signup takes about a minute and no card is required.
Open the signup page
Click Get started anywhere on the site, or go directly to /auth/signup.
Pick your account type
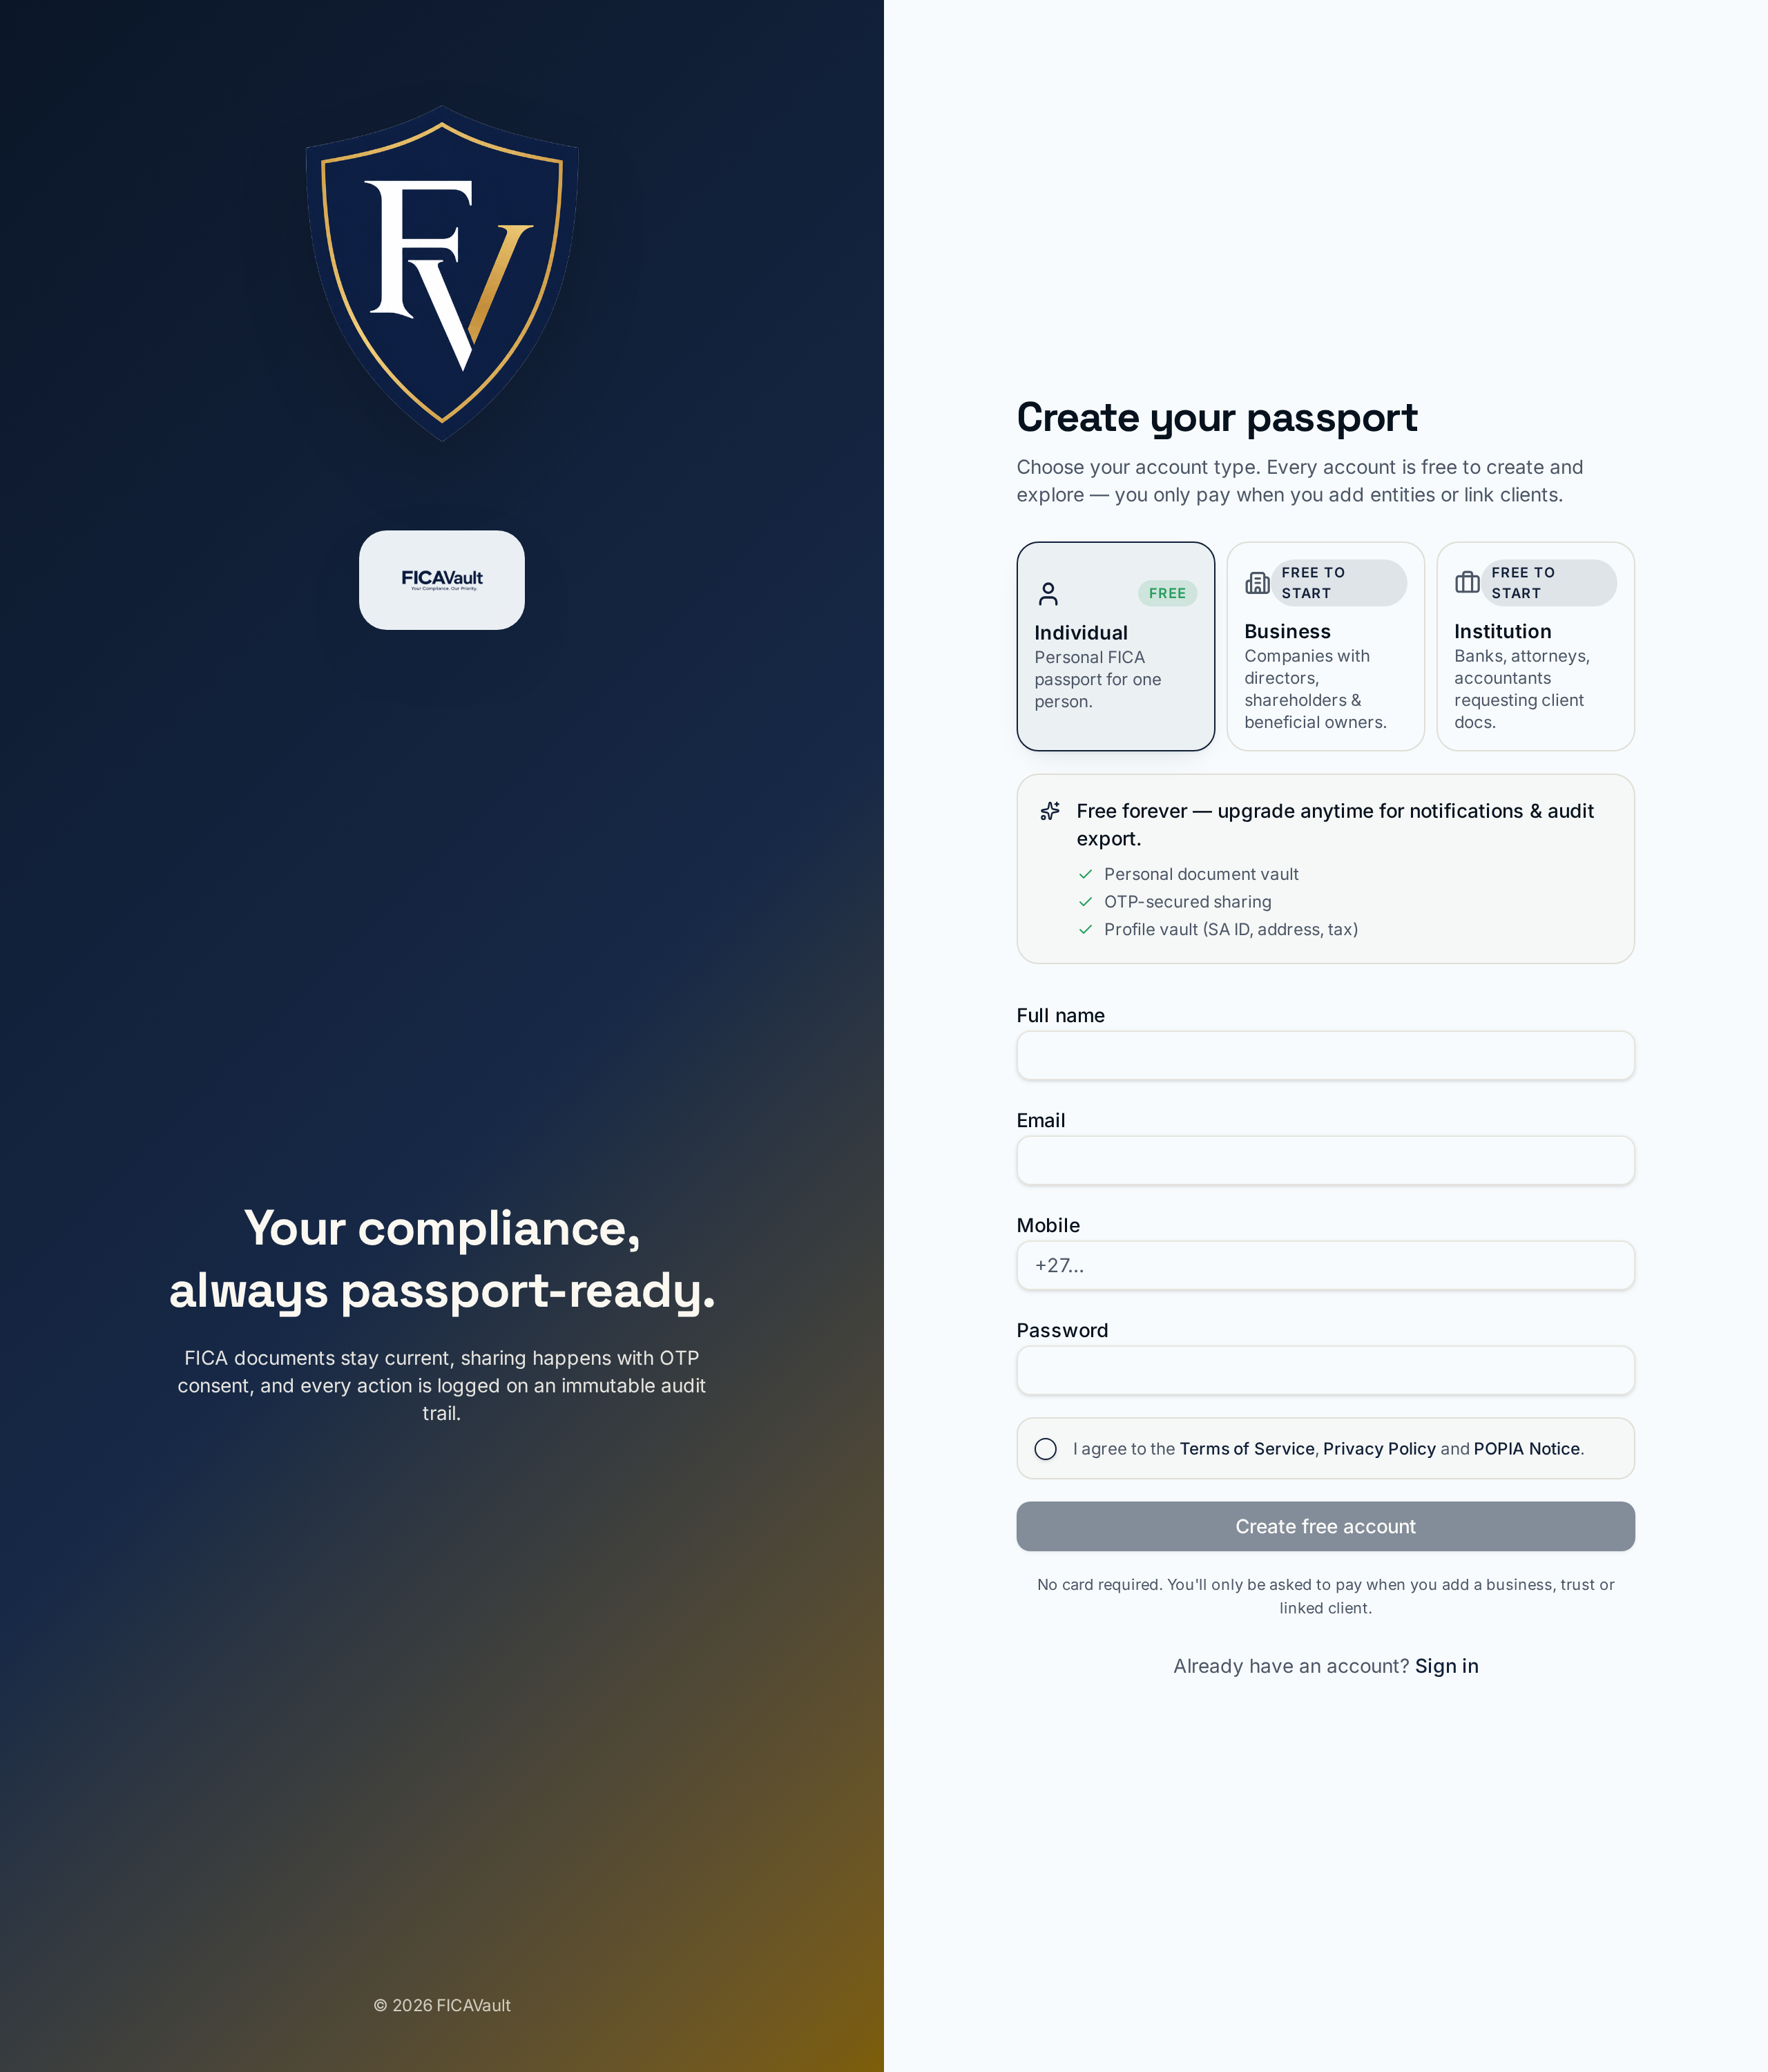
Choose Individual, Business or Institution. The description and pricing update to match your choice. You can change type later by contacting support if needed.
Fill in your details
Enter your full name (contact name for Business/Institution), a working email address, your mobile number, and a strong password.
Agree to the legal terms
Tick the box to accept the Terms of Service, Privacy Policy and POPIA Notice. The Create free account button unlocks once the box is ticked.
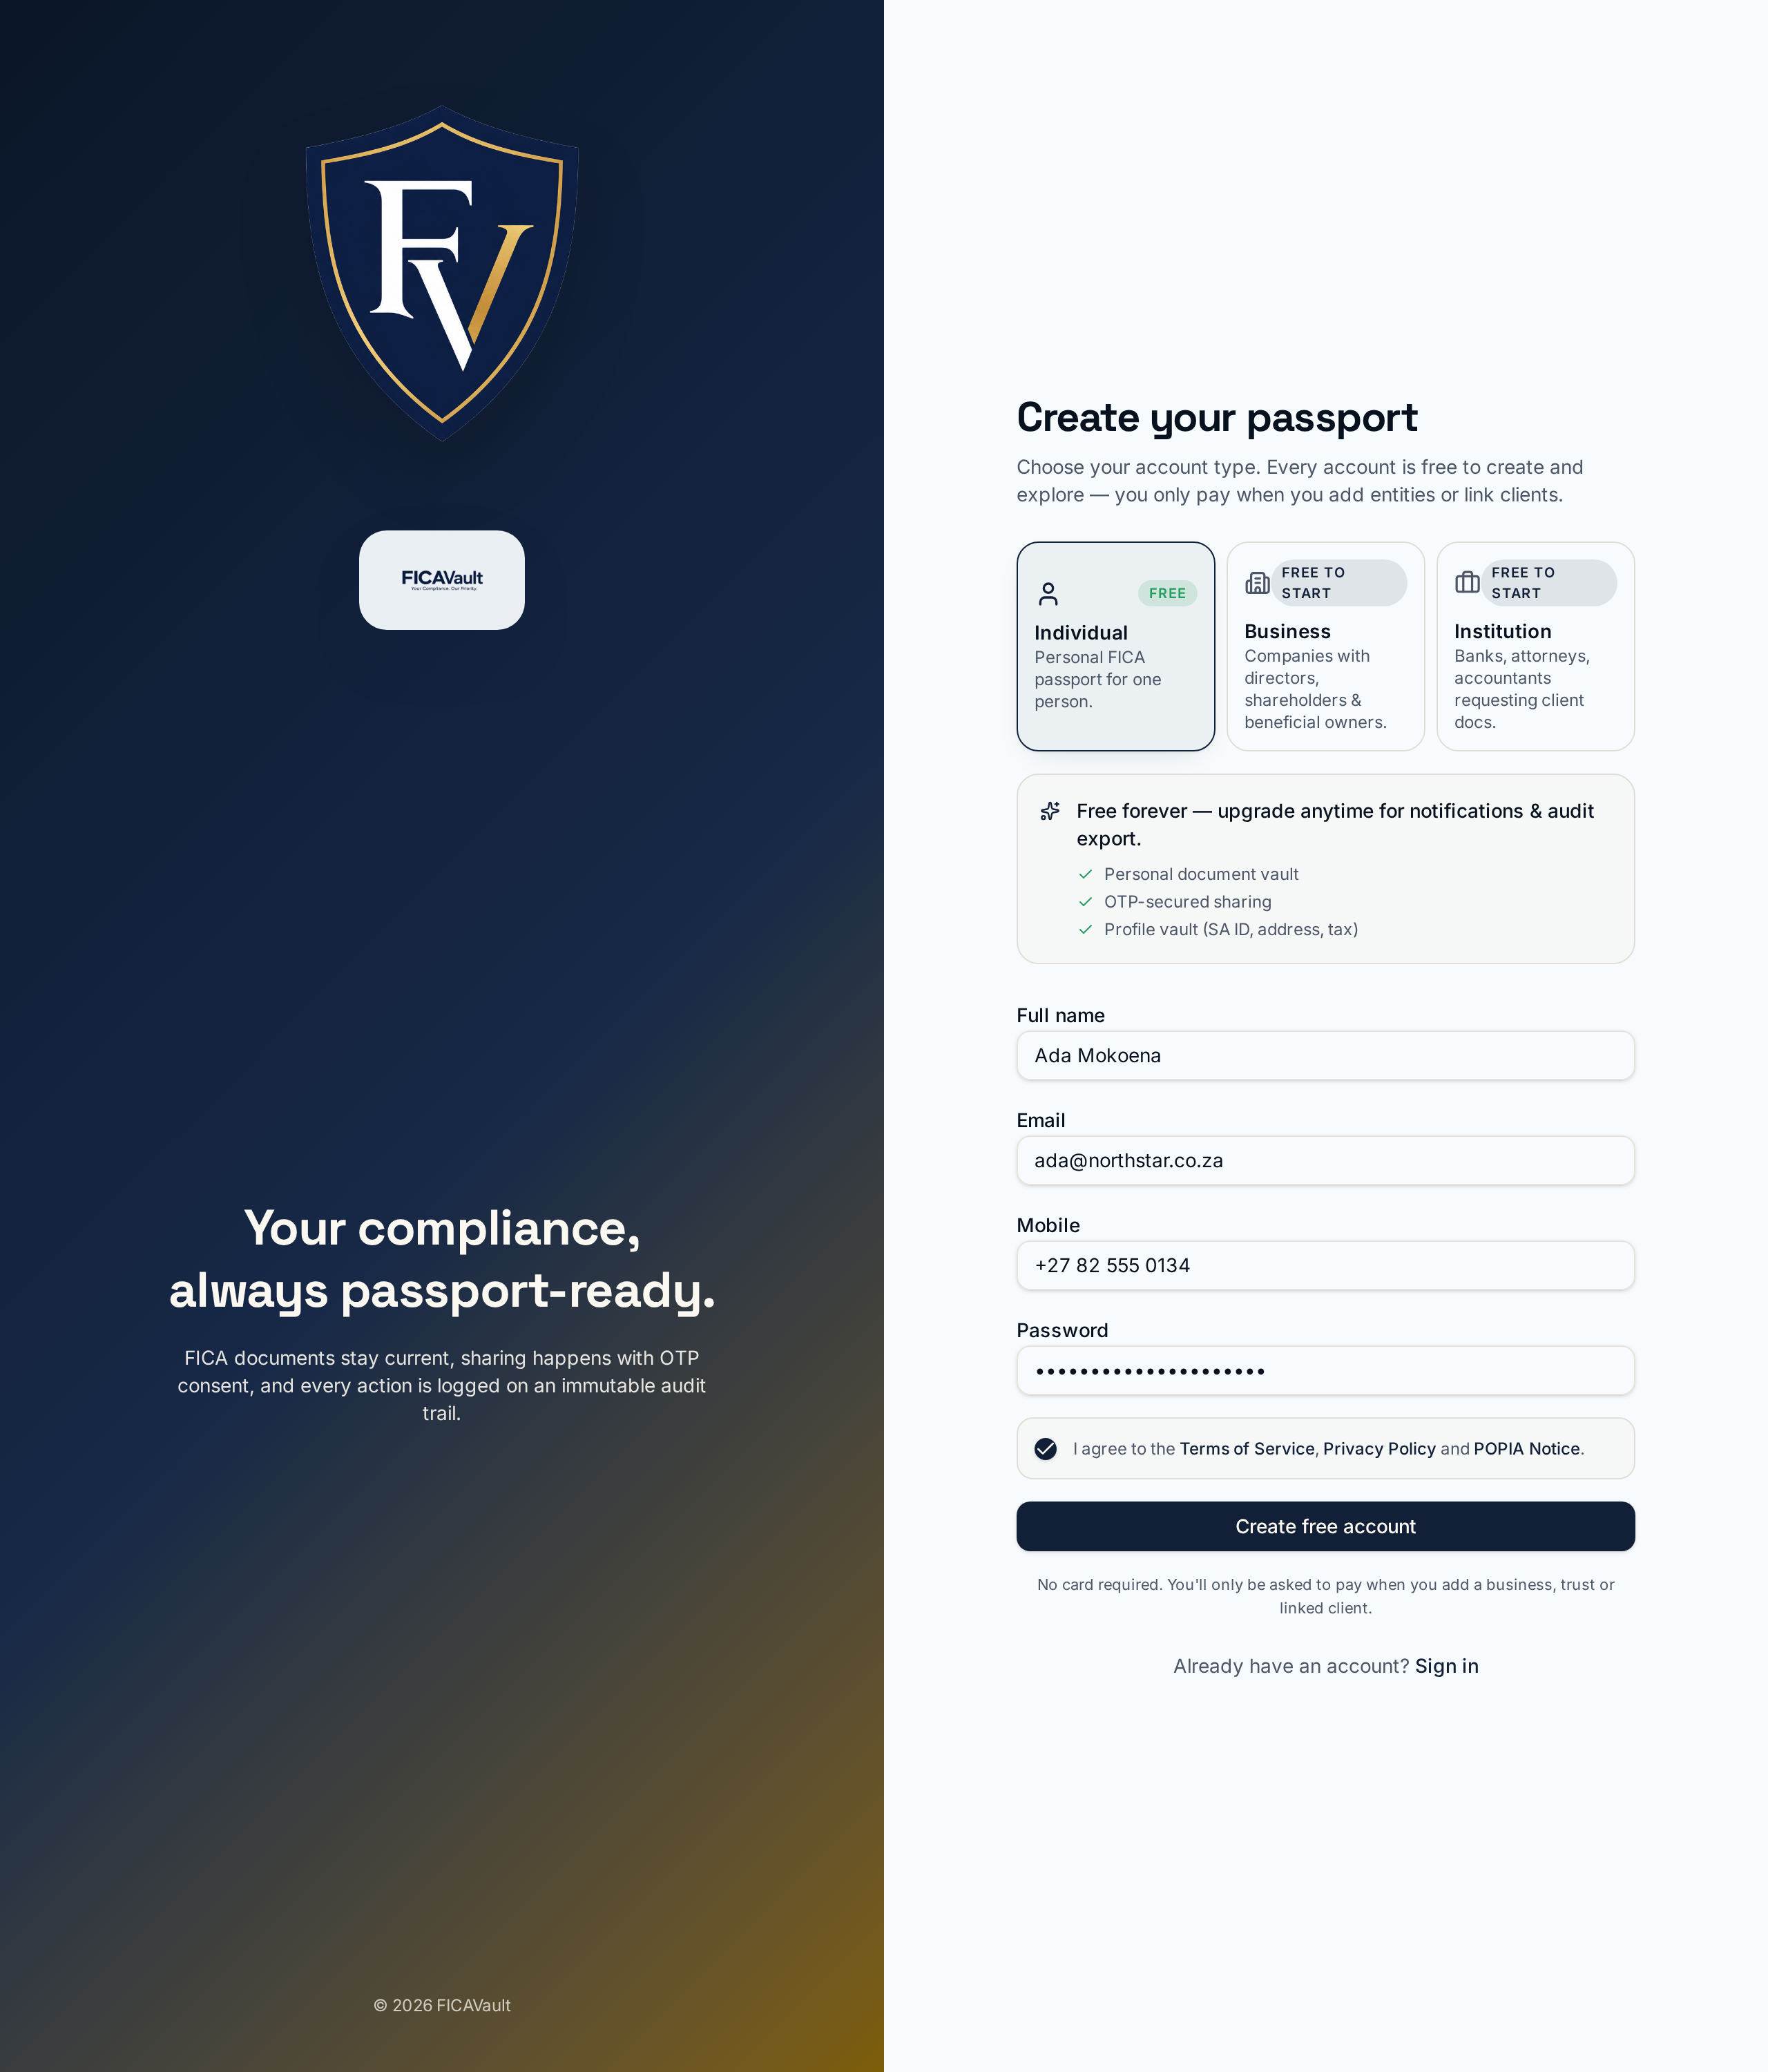
Submit
Click Create free account. We create your account and send a confirmation email to the address you supplied.
5. The confirmation email
Within a minute of signup you'll receive an email from no-reply@ficavault.app with the subject Confirm your email for FICAVault.
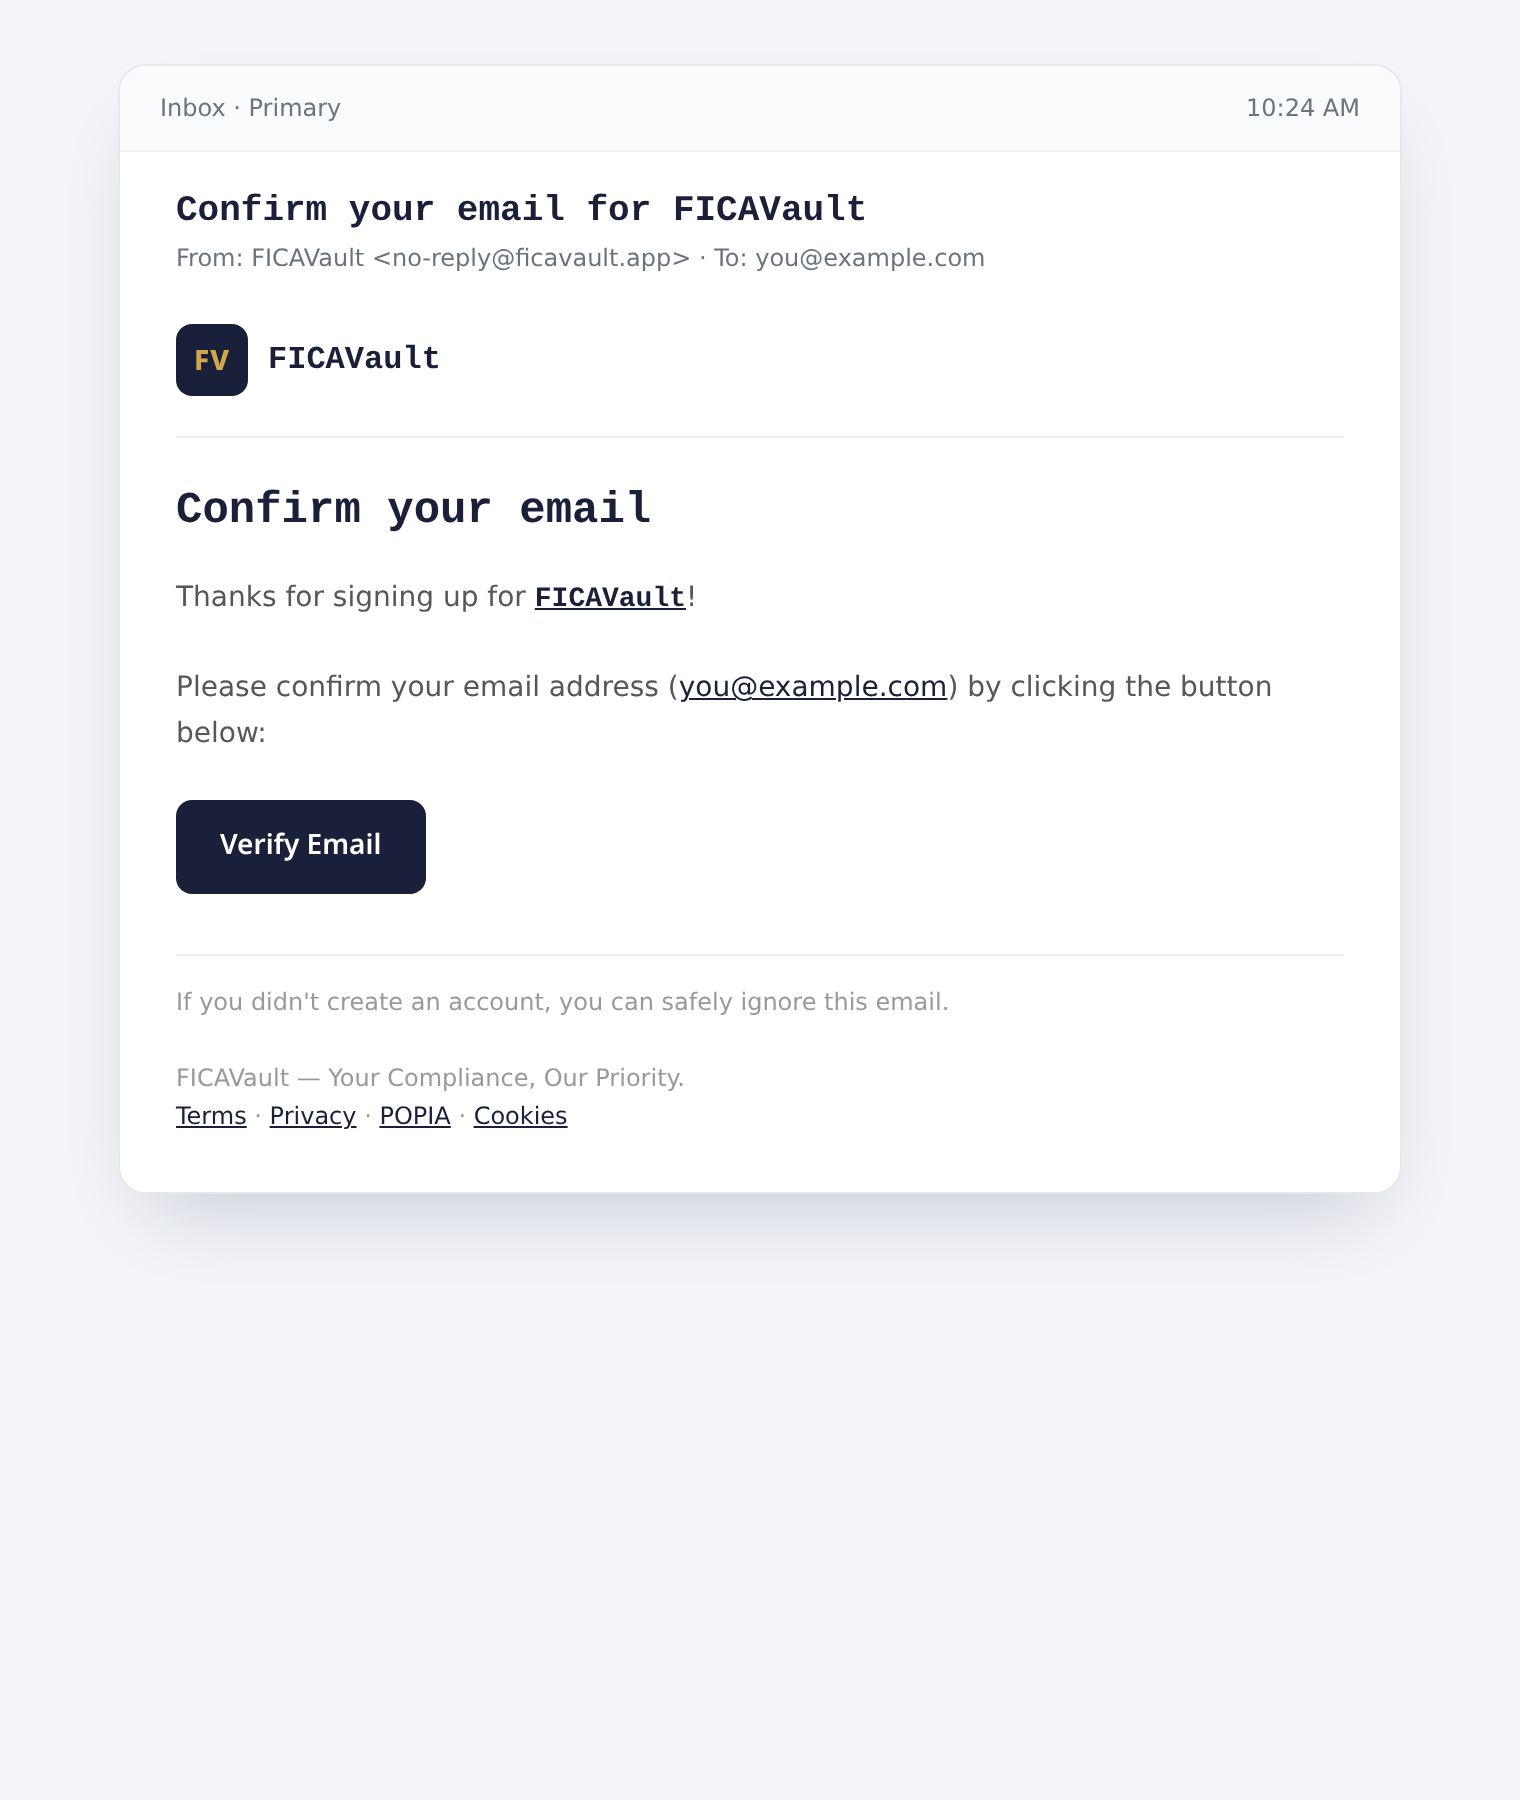
Click Verify Email — you'll be redirected to your new dashboard.
6. First login & profile setup
Every user is guided through a short onboarding on first login:
- Confirm your mobile so OTPs can reach you.
- Complete your profile vault — SA ID, current address, tax number.
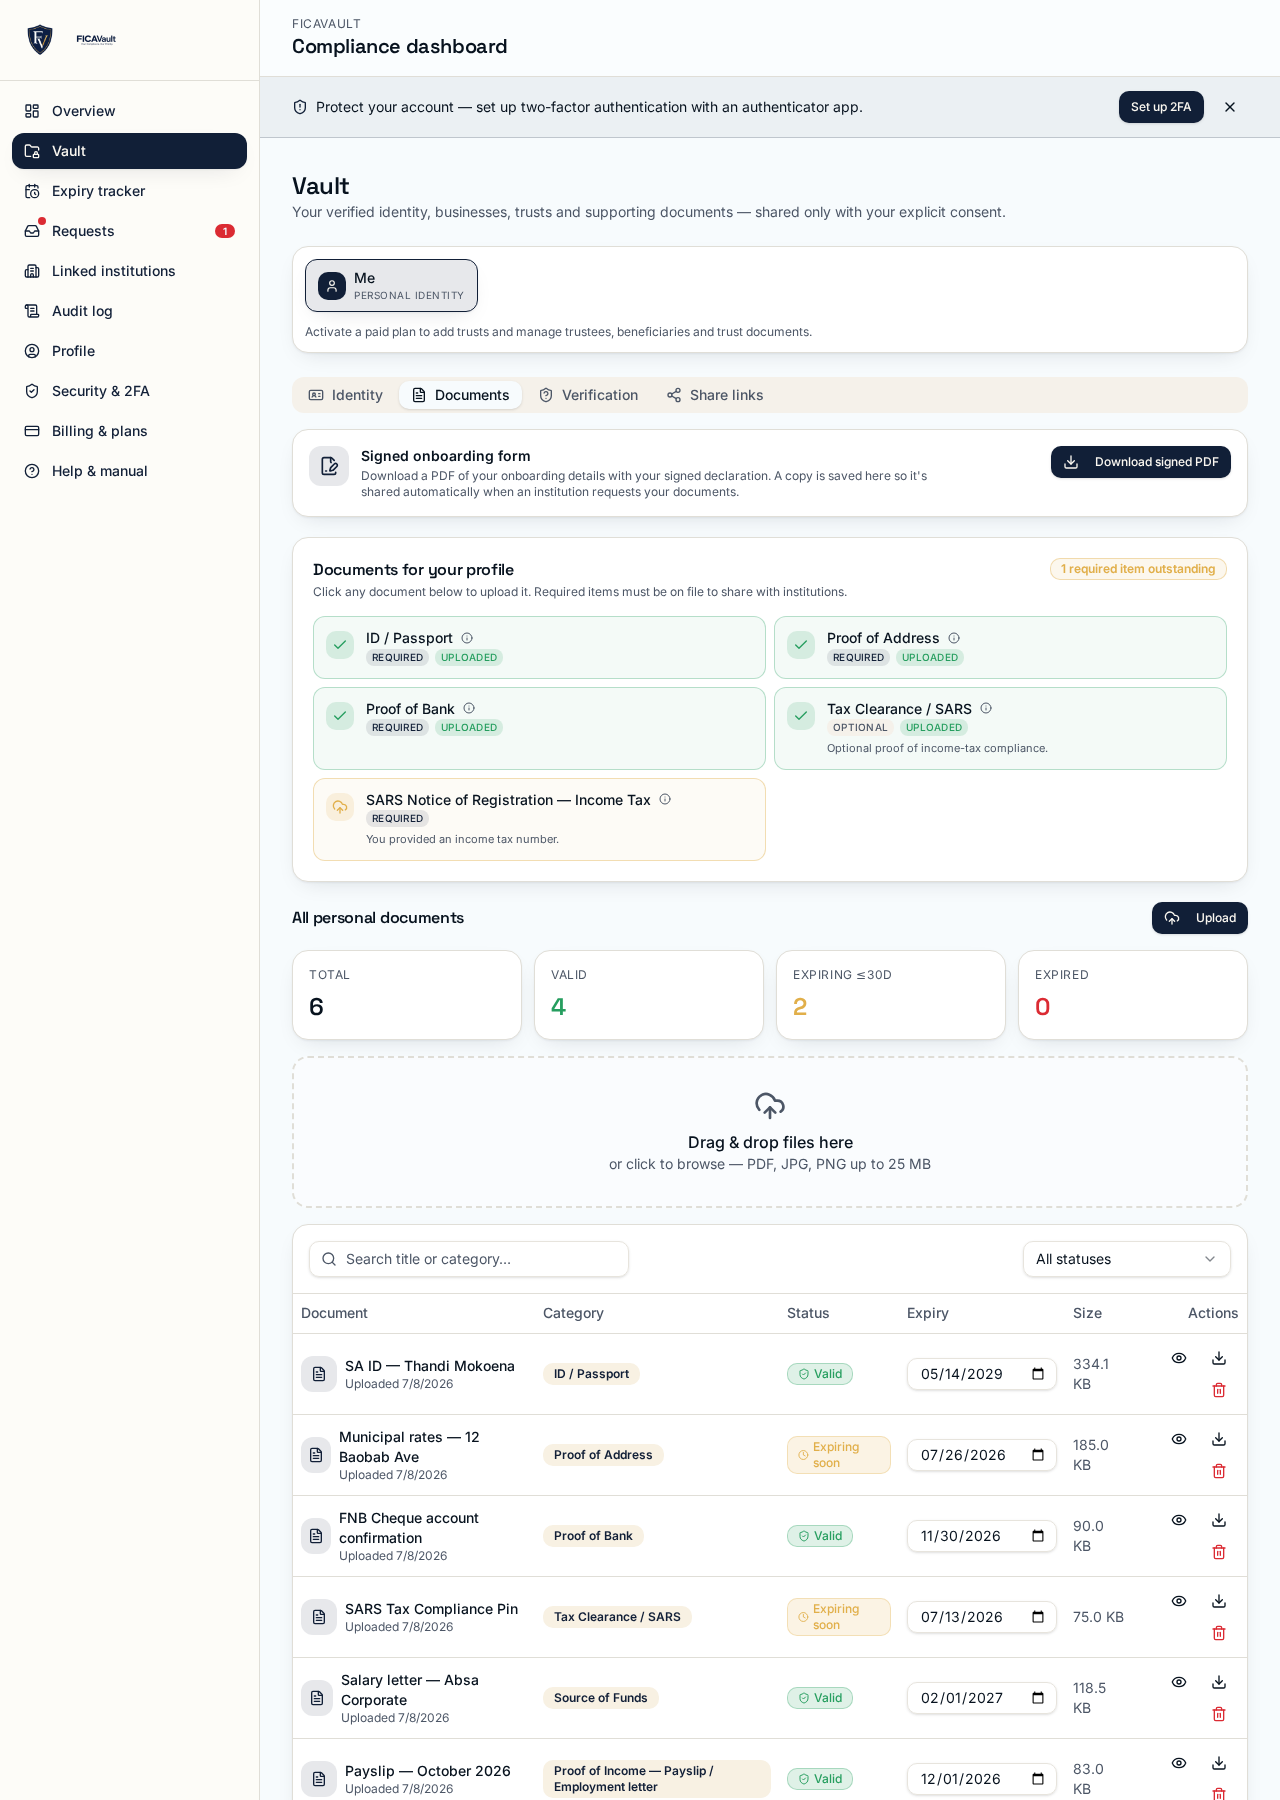
- Upload your baseline documents (ID copy, proof of address, bank confirmation, SARS tax certificate).
7. The guided onboarding wizard
After your first sign-in FICAVault walks you through a seven-step wizard that builds your compliance profile. You can leave and return at any time — every answer is saved as you go, and the progress bar at the top shows exactly where you are.
The seven steps in order are:
- Identity — title, nationality, name, ID / passport, occupation.
- Contact — verified mobile and email for OTP delivery.
- Address — residential and postal, with SA address autocomplete.
- Tax — SARS tax number and, if applicable, PAYE reference.
- Applicable documents — tick which document types apply to you; the checklist adapts.
- Uploads — attach ID, proof of address, bank confirmation and any tax documents.
- Sign & finish — confirm the declaration; a signed PDF is generated and stored in your vault.
8. Individual user guide
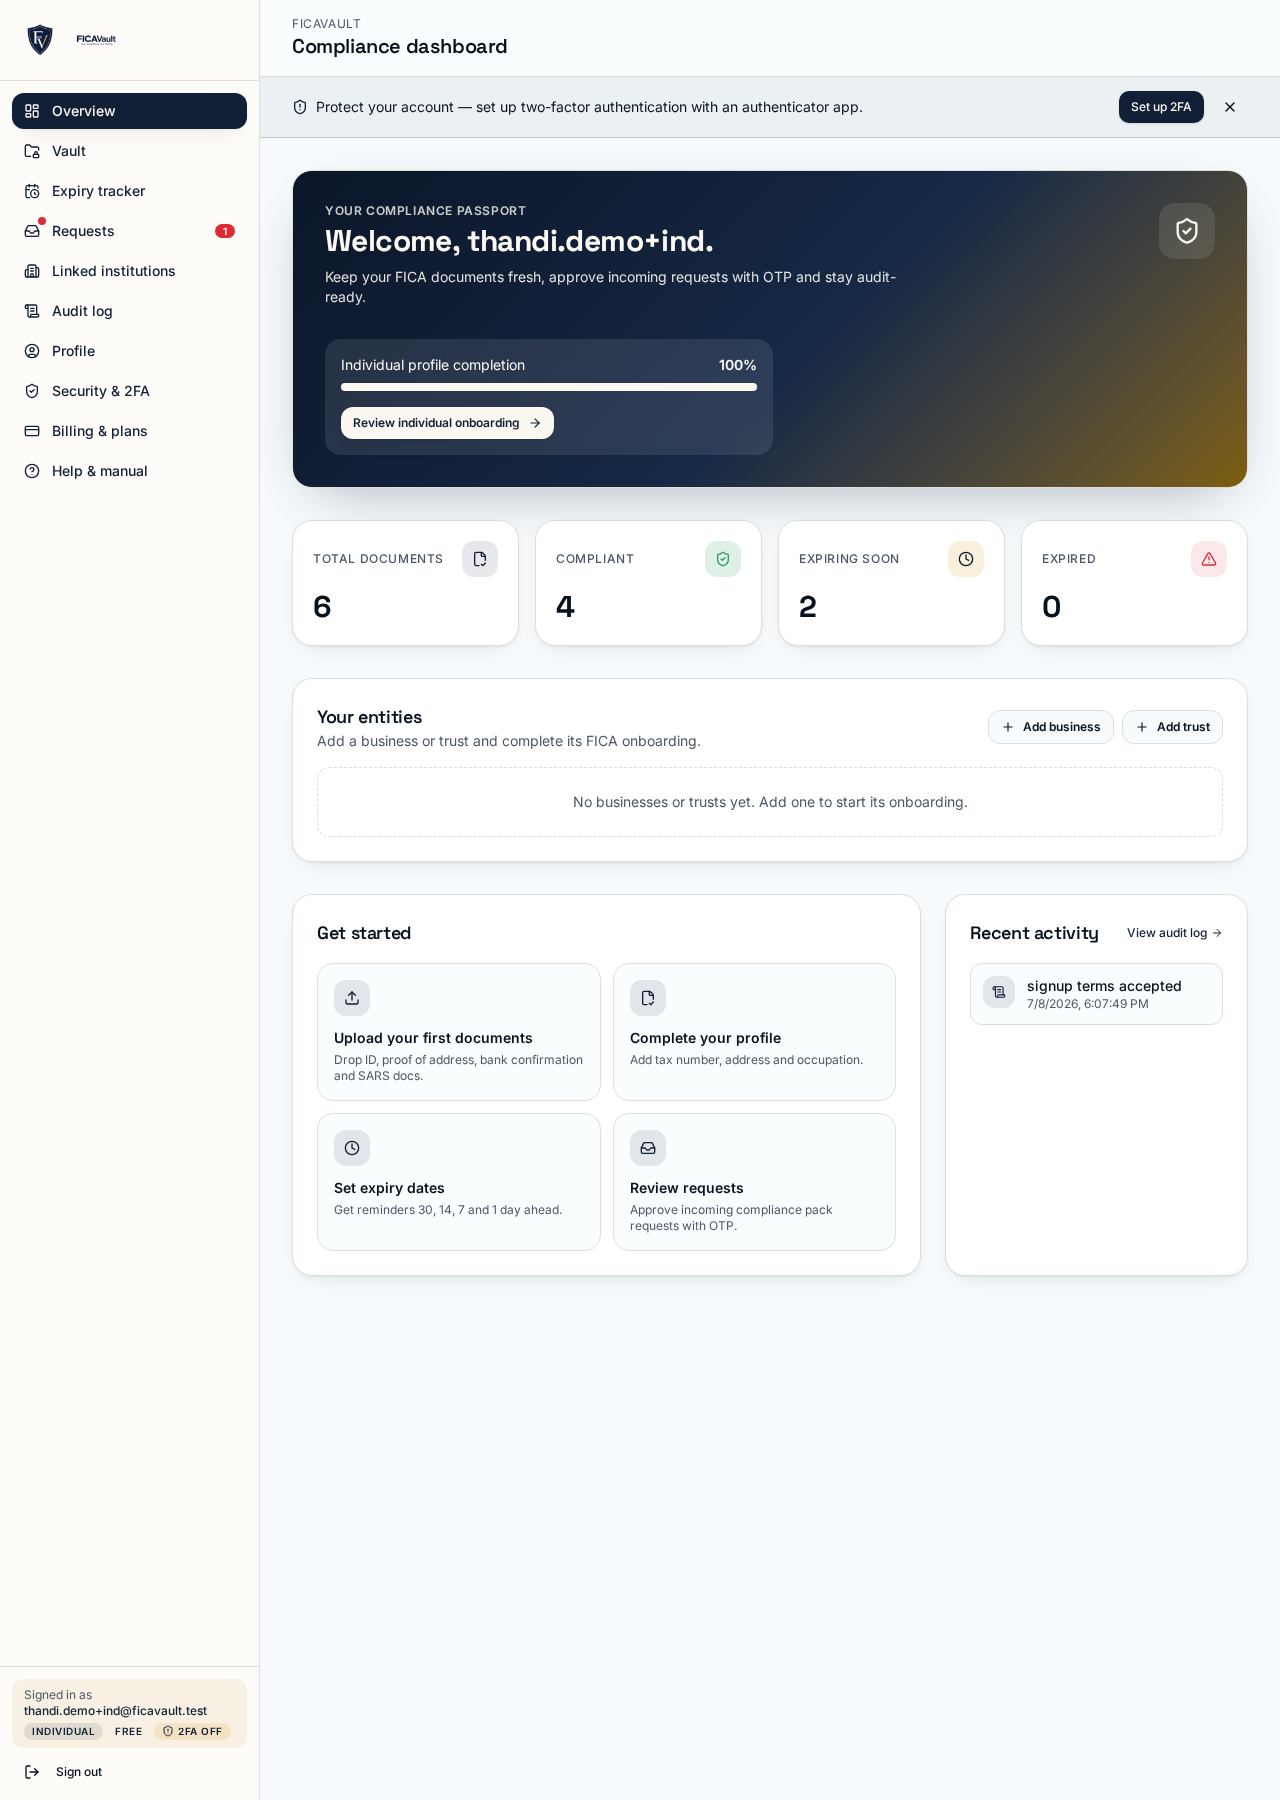
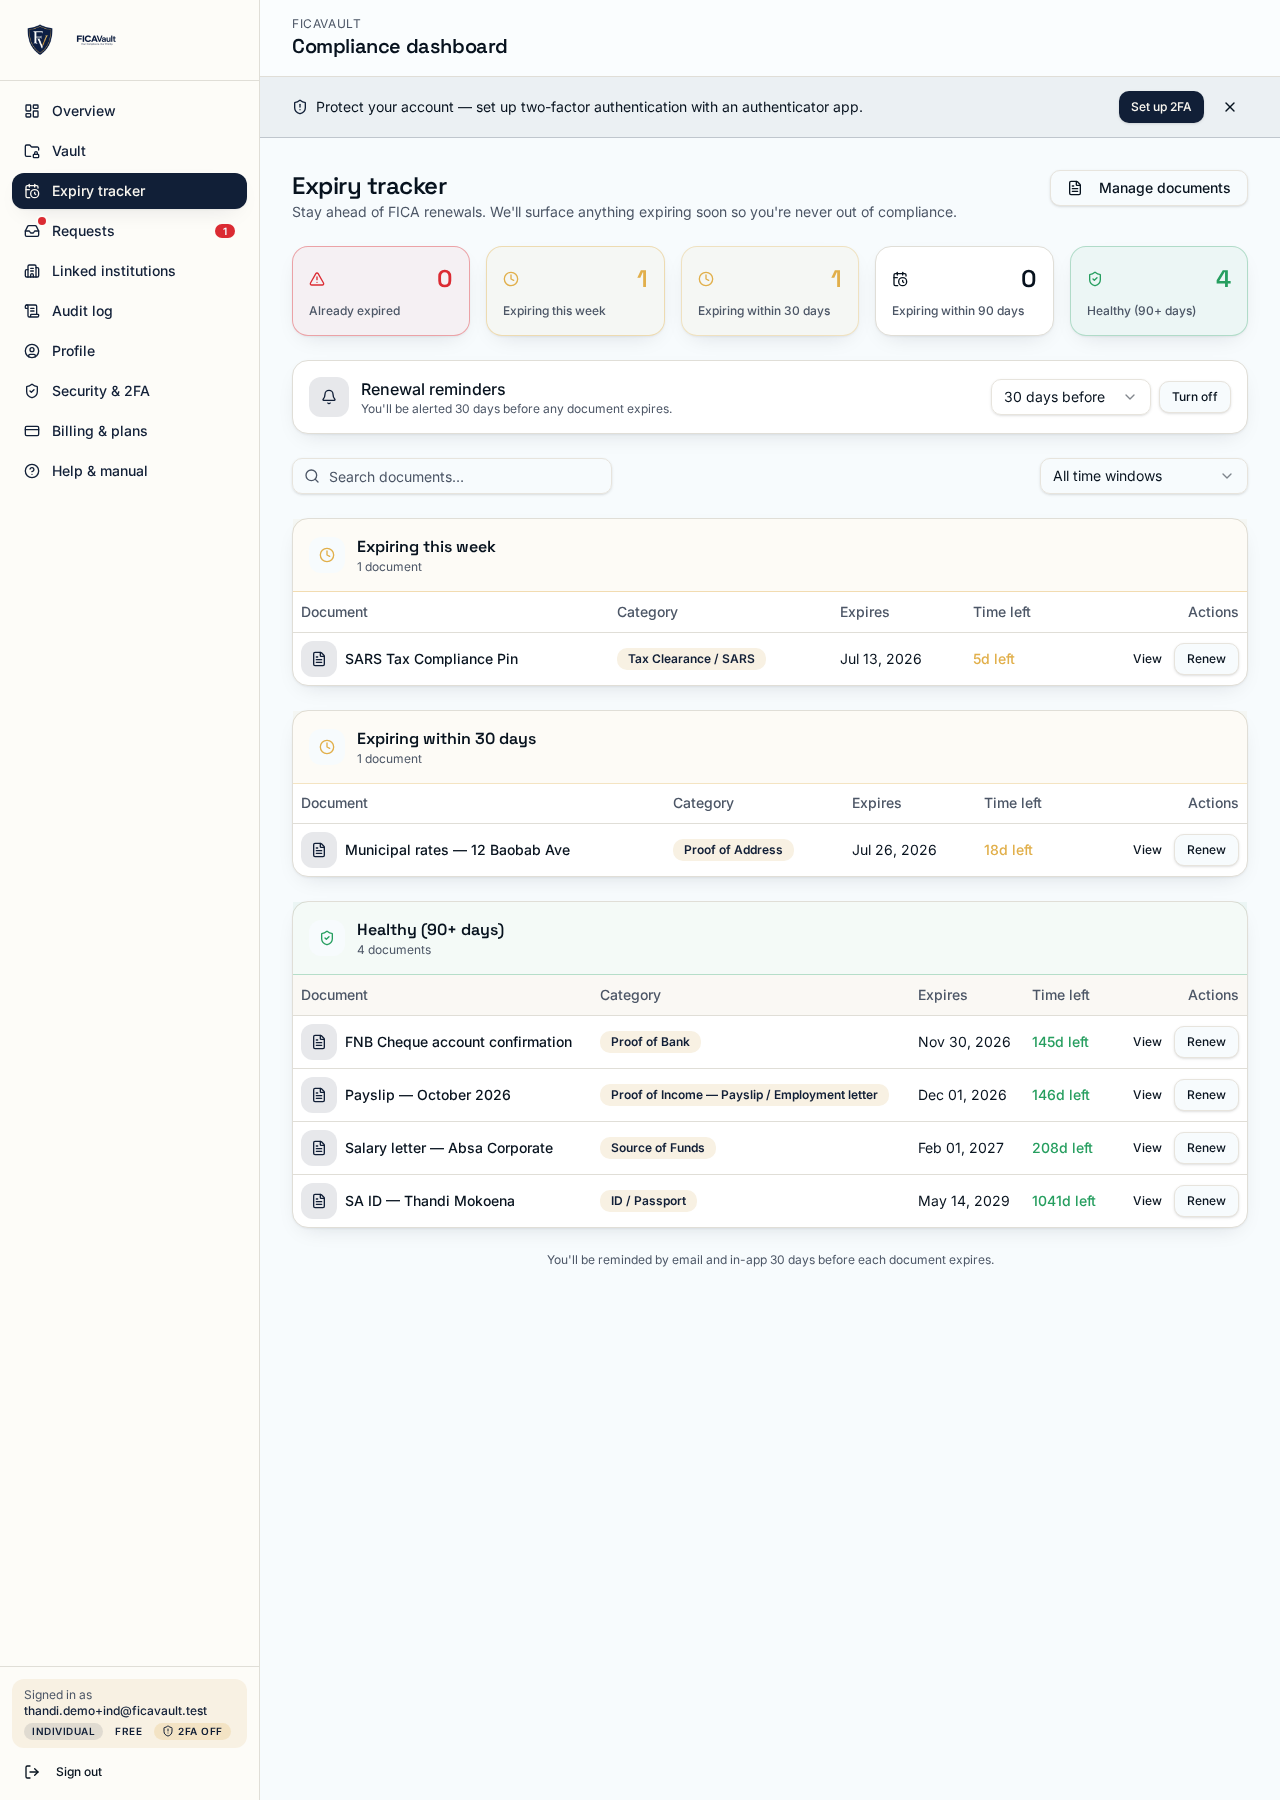
Your Individual dashboard shows five things: your vault, your profile, your share requests inbox, your expiry tracker, and your audit log.
- Vault. Upload documents by category (ID, proof of address, bank, tax, other). Each upload is encrypted at rest. Required items are called out at the top so you always know what's still missing.
- Profile vault. The structured information — SA ID number, address, tax number — that institutions typically ask for alongside documents.
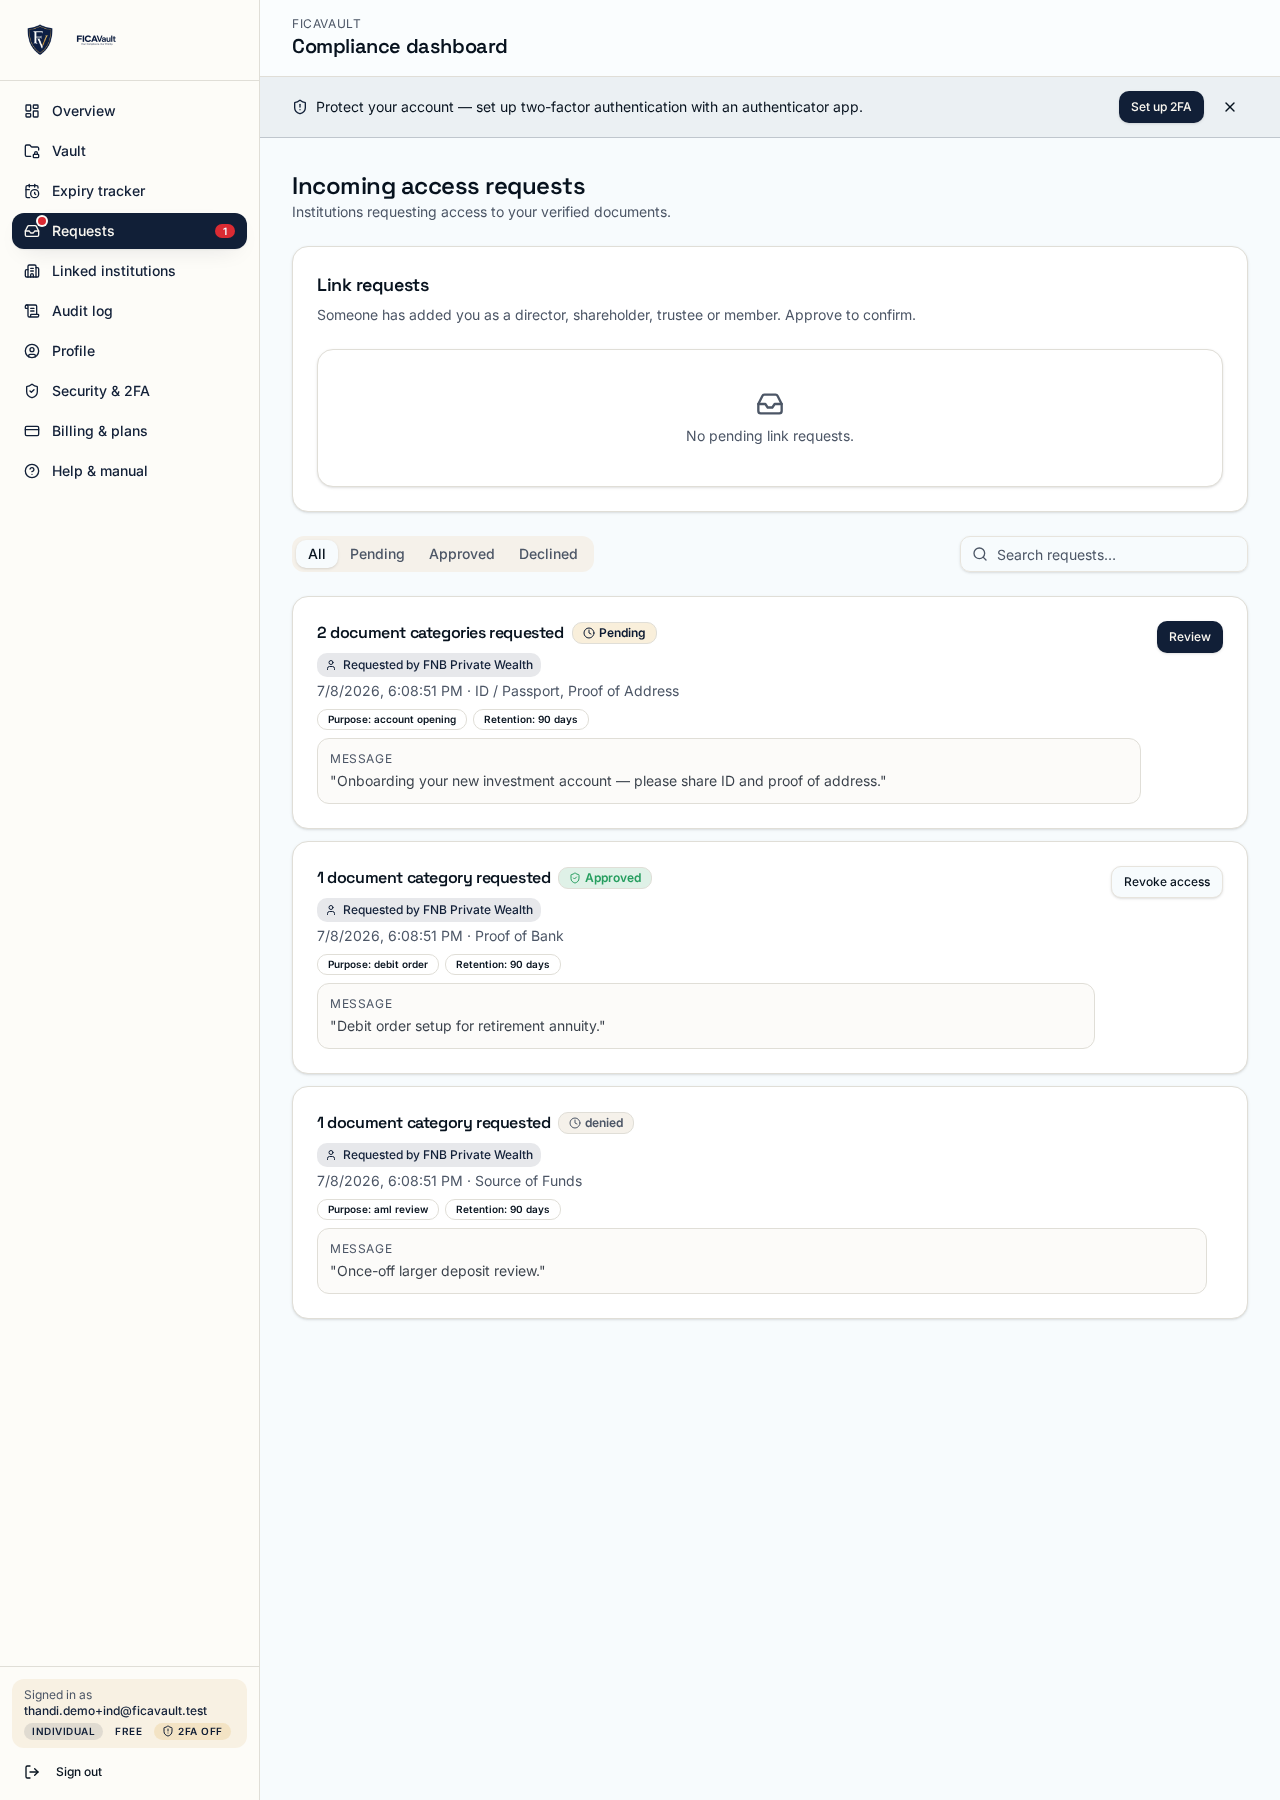
- Requests. Any institution asking for documents appears here as a pending card. See section 11 for how to handle them.
- Expiry tracker. See what's about to expire, and re-upload with one click.
9. Business user guide
A Business account groups multiple entities under one owner. Each entity has its own vault, directors, shareholders and beneficial owners.
- Personal vault included. Your Individual passport is bundled with every Business account.
- Adding an entity. Go to Dashboard → Organisation → Add entity. Billing begins the moment your first entity is added — up to 2 entities are covered by the R 100 base, then R 30 / entity.
- Directors & beneficial owners. Invite each person by email so they can maintain their own FICA documents — you never store their passwords.
- Shared entity vault. Company docs (registration, resolution, bank letter, tax number, BO register) live in the entity vault; personal docs stay with each individual.
10. Institution user guide
Institutions use FICAVault to request documents from clients and to keep an organised, auditable record of what was collected and when.
- Linked clients. Add a client by searching FICAVault, or invite by email if they're not yet a user (a blind request). Your R 1 499 / month base covers 25 linked clients; add more in blocks of 25 for R 250 / block.
- Requesting documents. Pick an applicable-documents checklist (per client type / product) or request specific documents. See section 11.
- Team members. Invite colleagues and set roles. Actions are attributed to the individual team member in the audit log.
- Compliance pack. Export a full pack of what a client shared, when, and with which OTP consent — ready to hand to your compliance officer.
11. Document requests (Institution → Client)
A request has a clear lifecycle so both sides always know where they stand:
Pending
Institution has requested docs. Client sees a card in their inbox and gets an email.
Approved (OTP)
Client entered the OTP. Institution can now view the specific documents that were approved — nothing else.
Denied
Client declined. Institution can send a new request with a reason, or stop.
Accessed
Institution downloaded or viewed a document. Timestamp and IP are logged.
Expired
Approval window elapsed. Institution must request again.
Revoked
Client withdrew consent. Institution loses access immediately.
12. OTP consent — how approvals work
Whenever an institution requests documents, FICAVault:
- Adds a card to your inbox and sends you an email.
- Requires an OTP sent to your verified mobile or email before any file leaves your vault.
- Records the approval — with the OTP challenge, timestamp and IP — in your audit log.
- Grants the institution access to only the specific documents you approved, for a limited window.
For ad-hoc sharing that isn't tied to an existing request, use a share link — see the full step-by-step walkthrough in the next section.
13. Share links to an institution — step by step
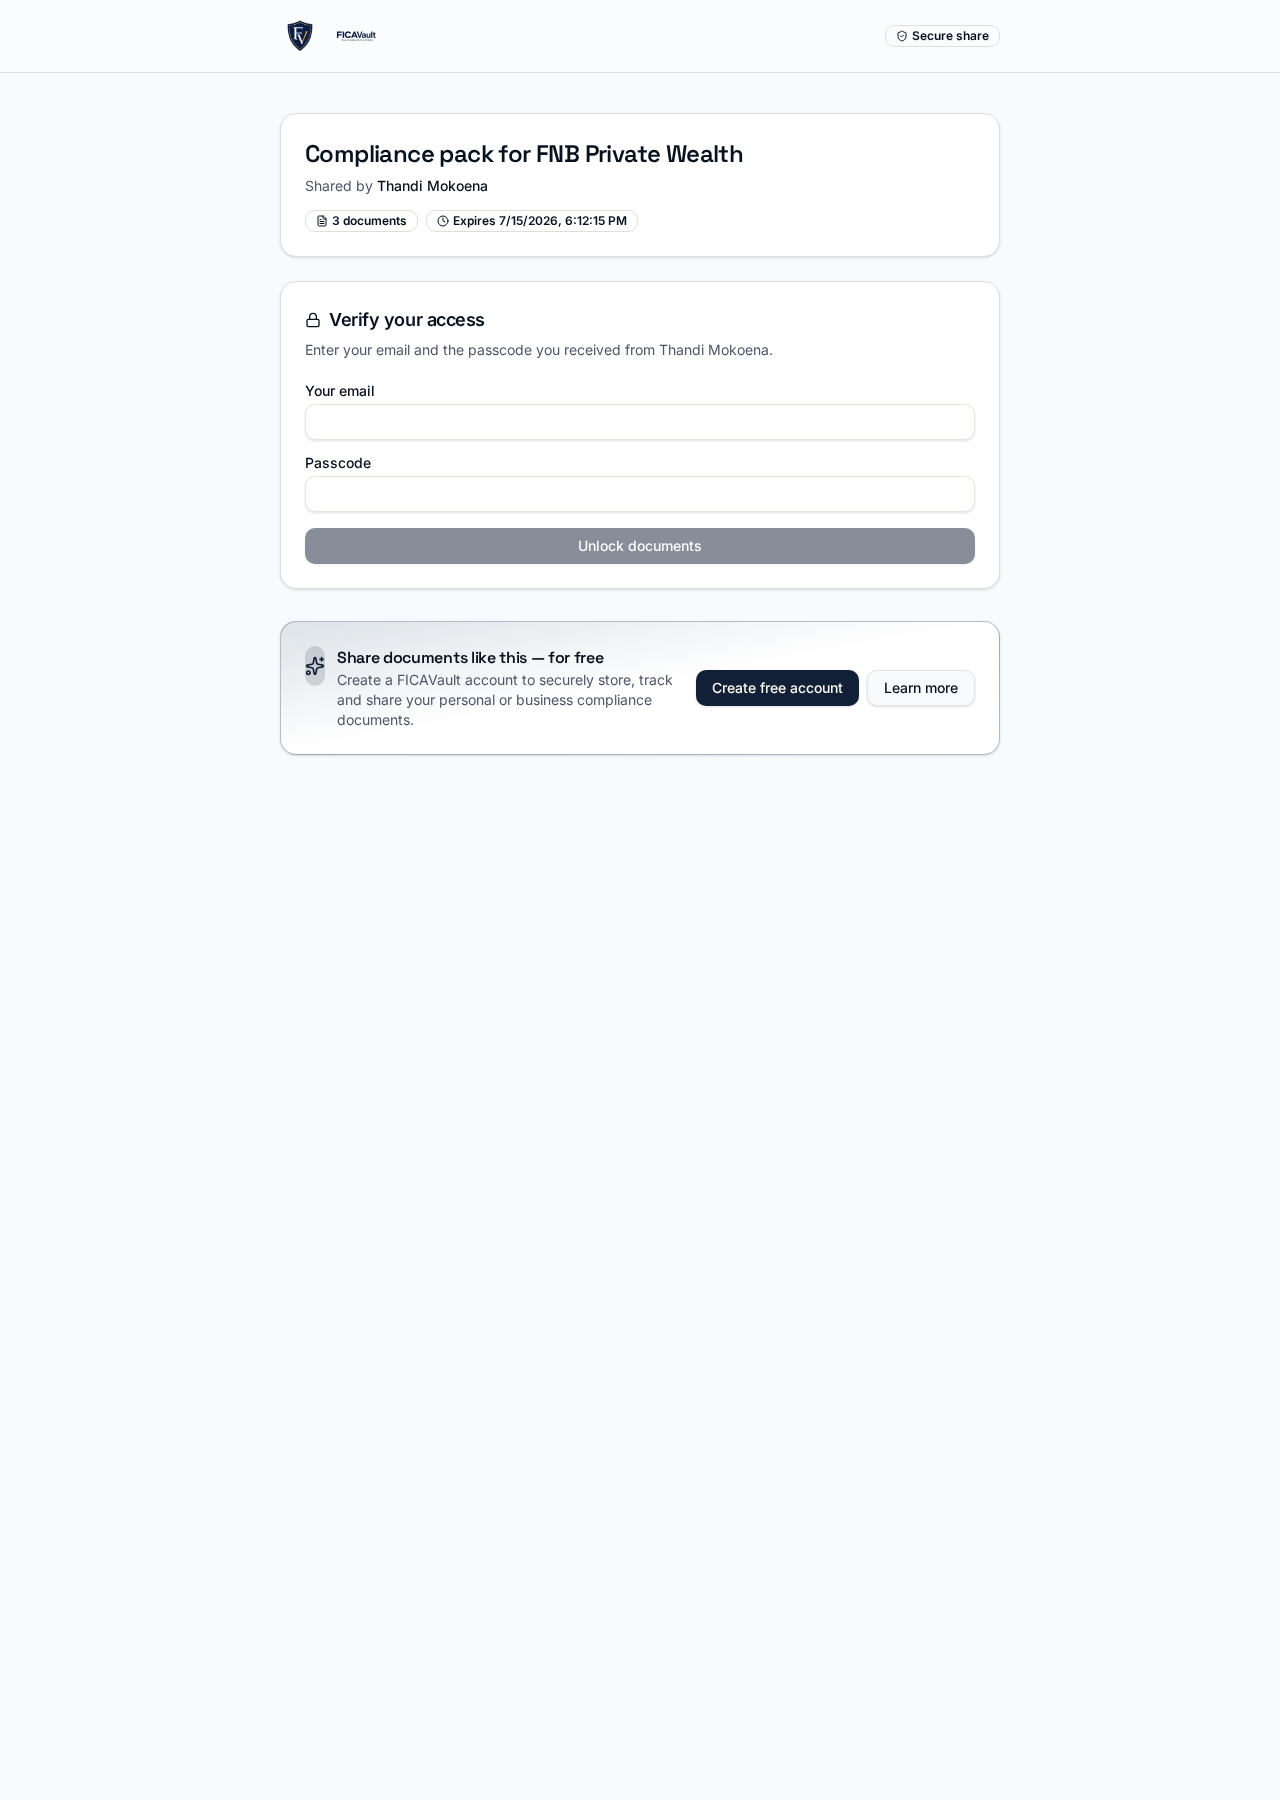
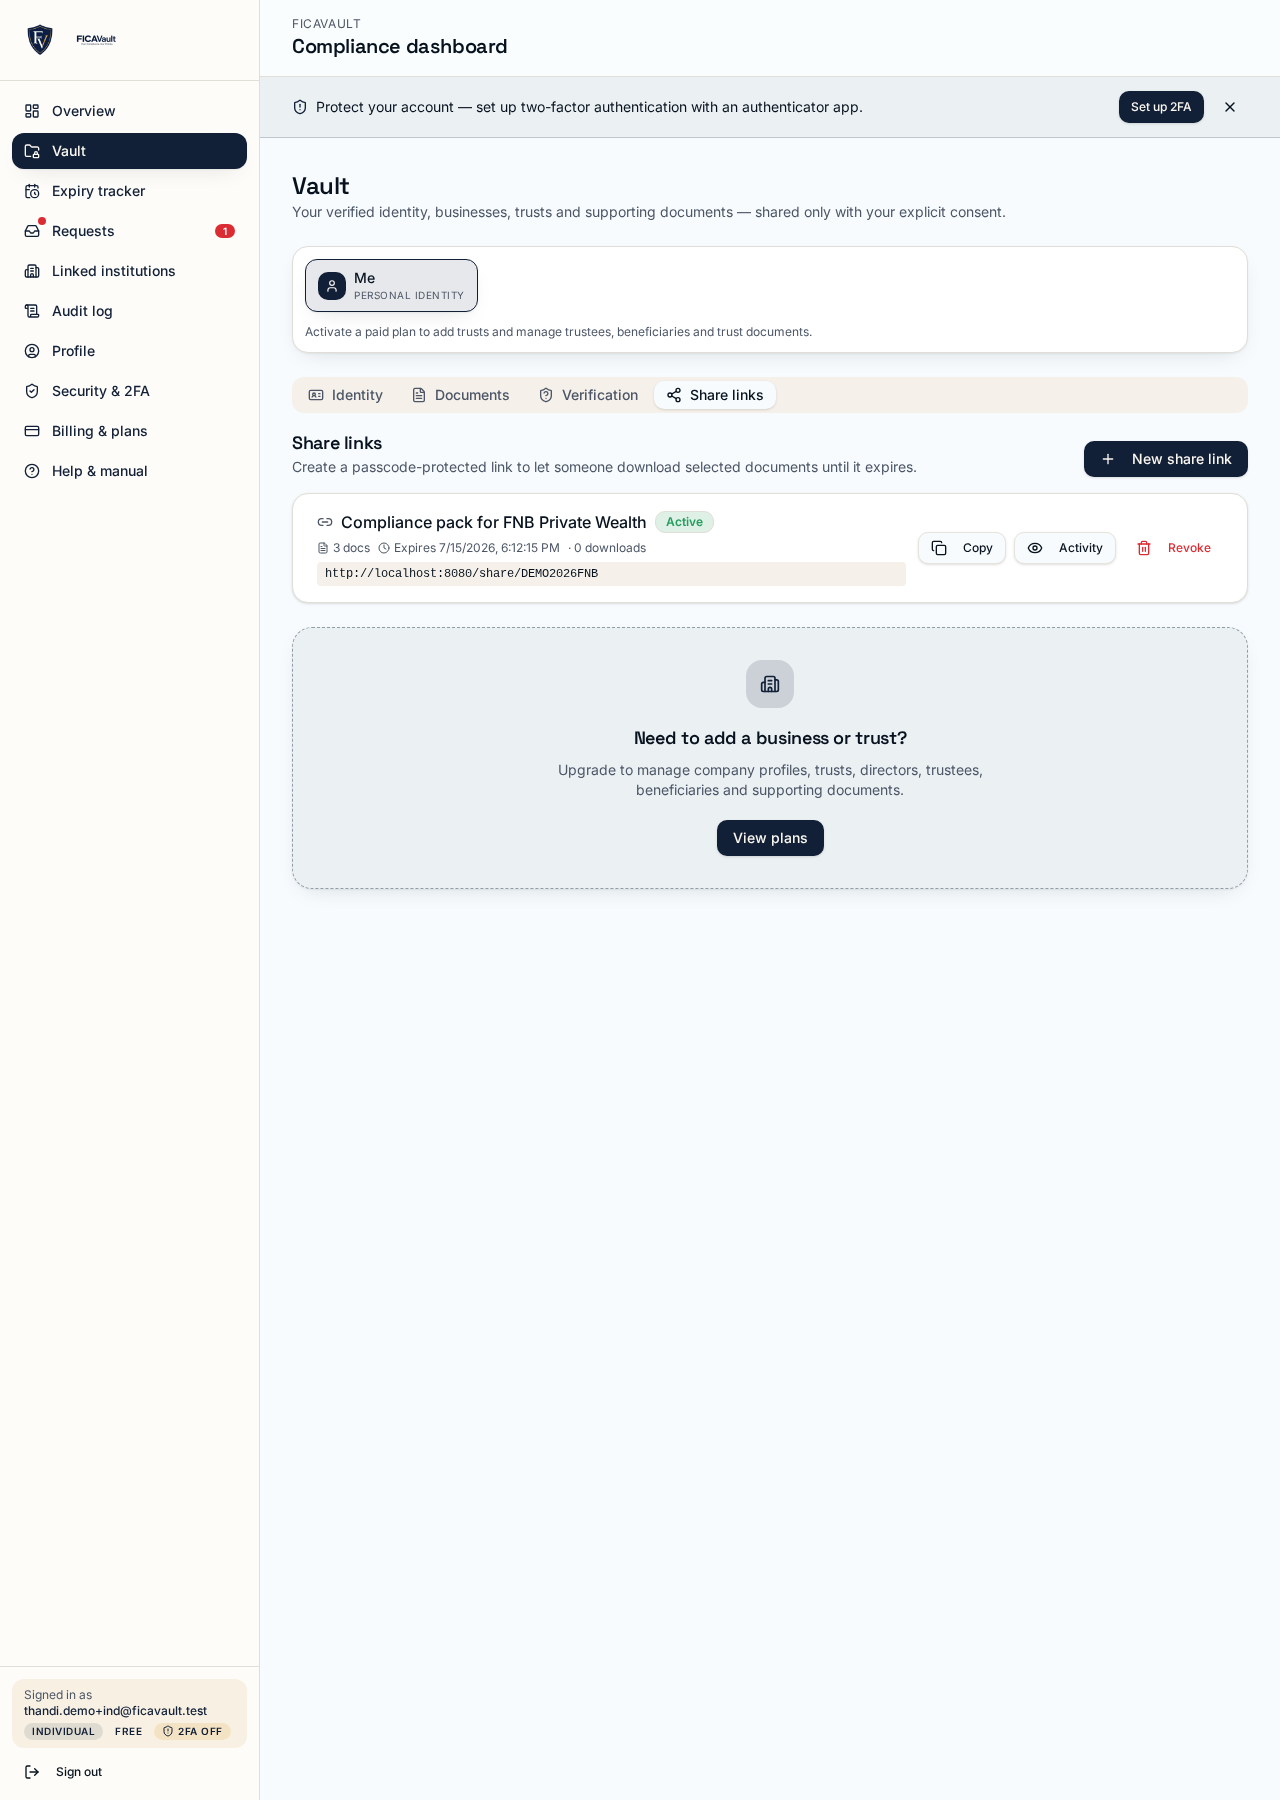
A share link is the fastest way to give a bank, advisor or attorney access to a specific set of documents. Each link is passcode-protected, tied to a single recipient email, has an expiry, and (optionally) a download cap. You can revoke it at any time and see every access in the activity log.
Open the share panel
Go to Dashboard → Vault, then switch to the Share links tab. Click New share link.
Describe the share
Add an internal label (e.g. FNB — client onboarding pack) so you can find the link again later, and enter the recipient's email. The recipient must enter this same email plus the passcode to open the link, so use their real work address.
Set expiry, download cap and passcode
Pick how long the link stays alive — 1 hour, 24 hours, 7 days or 30 days. Optionally cap the number of downloads (e.g. 5) so the link auto-disables even if the recipient forwards it. The passcode is hashed on our side; if you lose it, revoke the link and create a new one.
Pick the documents
Tick only the documents this institution actually needs. Documents are grouped by category (ID, proof of address, proof of bank, signed onboarding form, etc.) so you can share a full compliance pack in a couple of clicks.
Send the link and the passcode separately
Once created, the link appears in your Share links list. Click Copyto grab the URL and paste it into an email — then send the passcode over a different channel (WhatsApp, SMS, phone call). If you're on your phone, the dialog gives you one-tap WhatsApp buttons for both the link and the passcode.
Monitor and revoke
Click Activity on any link to see every event — link opened, passcode challenged, documents downloaded, with timestamps. If anything looks wrong, click Revoke and the link stops working immediately (even mid-download).
14. The audit trail
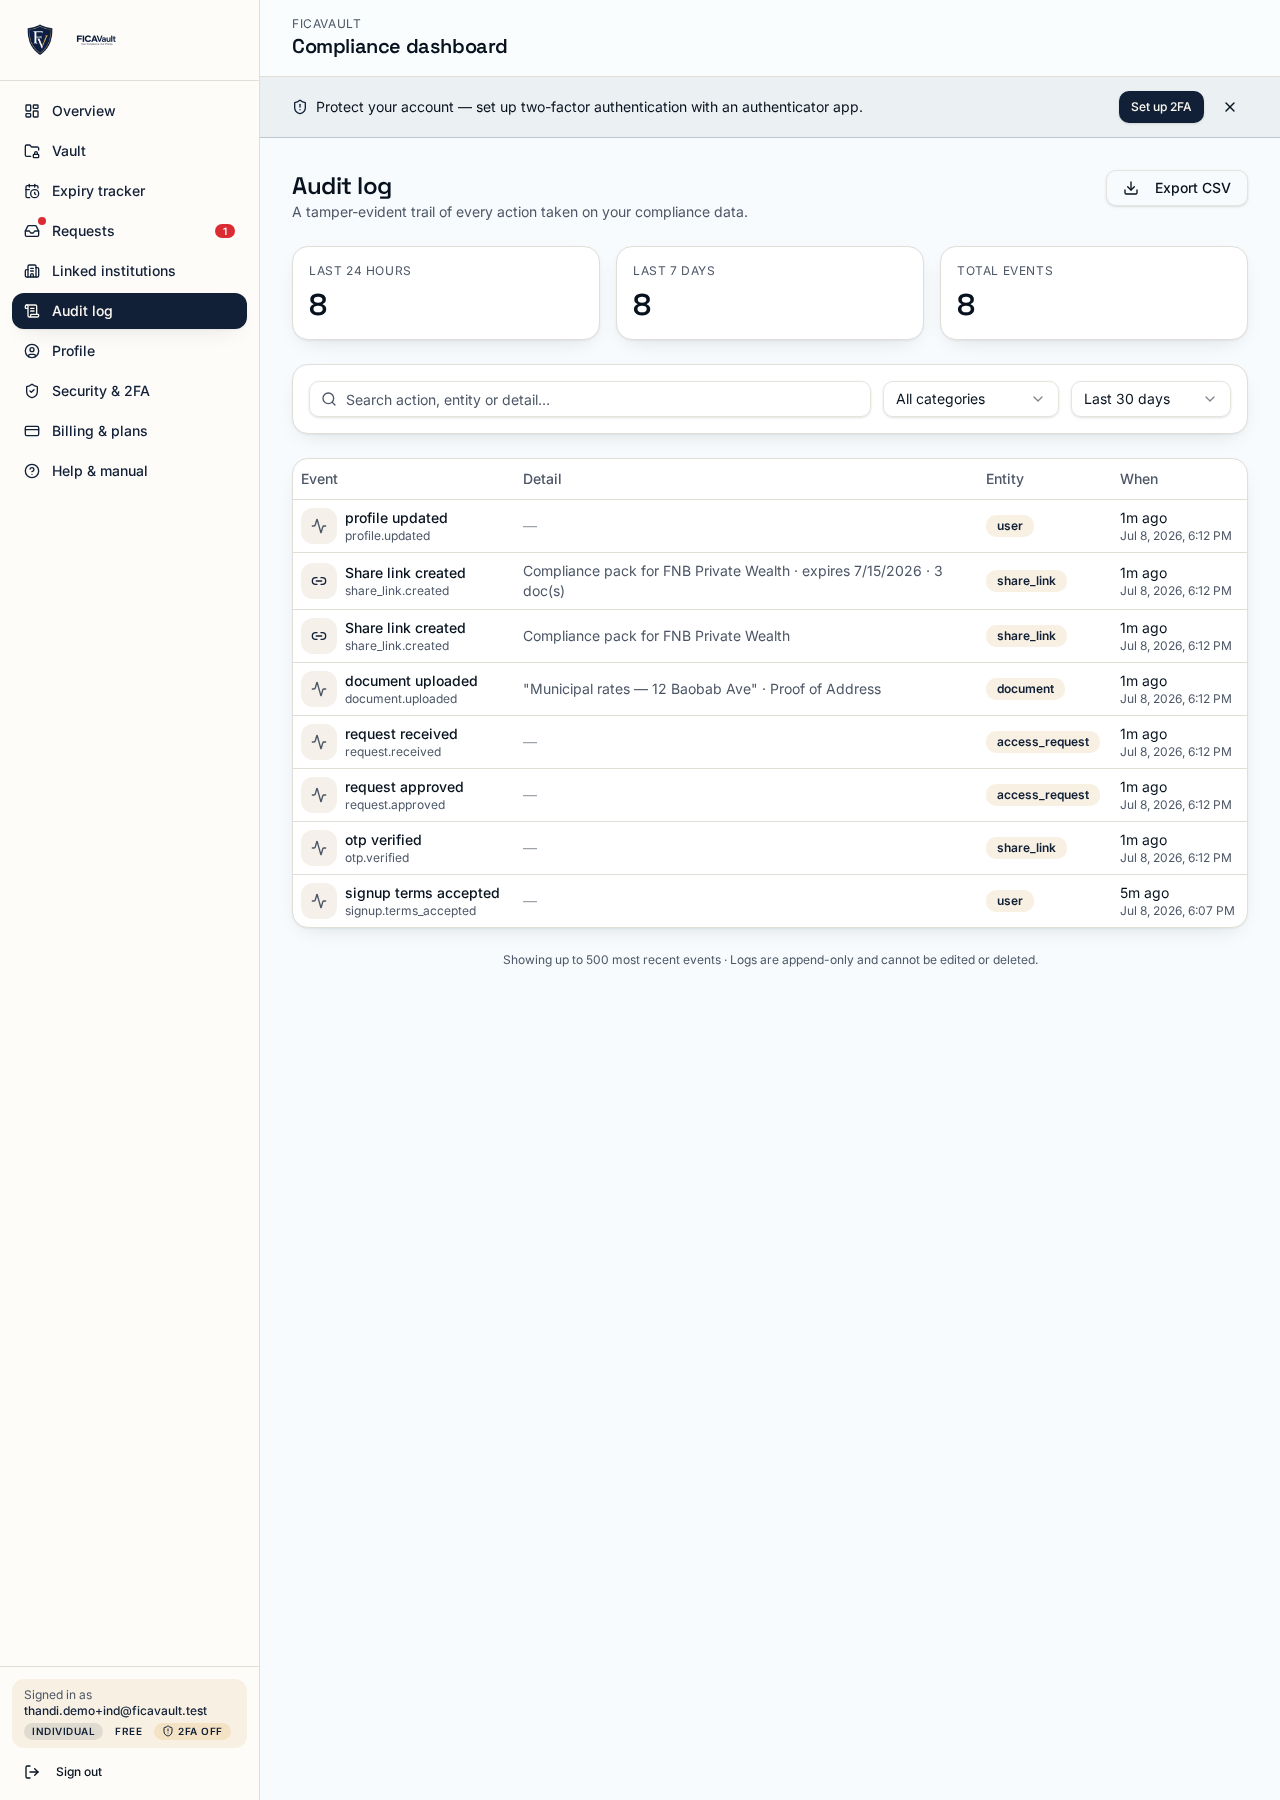
Every meaningful action in FICAVault is written to an append-only audit log. Nothing can be deleted or edited retroactively.
What is logged:
- Account events — signup, login, password change, email change, 2FA enrol.
- Vault events — upload, replace, archive, expiry roll-over.
- Request events — created, viewed by client, OTP challenged, approved, denied, expired.
- Access events — file previewed or downloaded, and by which team member.
- Share-link events — link generated, opened, passcode challenged, revoked.
- Admin events — role changes, entity added/removed, billing changes.
What is captured per event: who, what, when (UTC), source IP, user-agent and a stable event ID.
Individuals see their own log under Dashboard → Audit. Institutions can filter by client, team member or date and export the log as a compliance pack (CSV + PDF).
15. Data protection & how privacy is enforced
- Encryption in transit and at rest. All documents travel over TLS and are stored encrypted.
- Least-privilege access. Row-level security means one user cannot query another user's data — checked on every request at the database.
- Consent-first sharing. Institutions cannot access your documents until you approve with OTP or a share link.
- Auditable disclosures. Every access leaves a permanent record you can inspect.
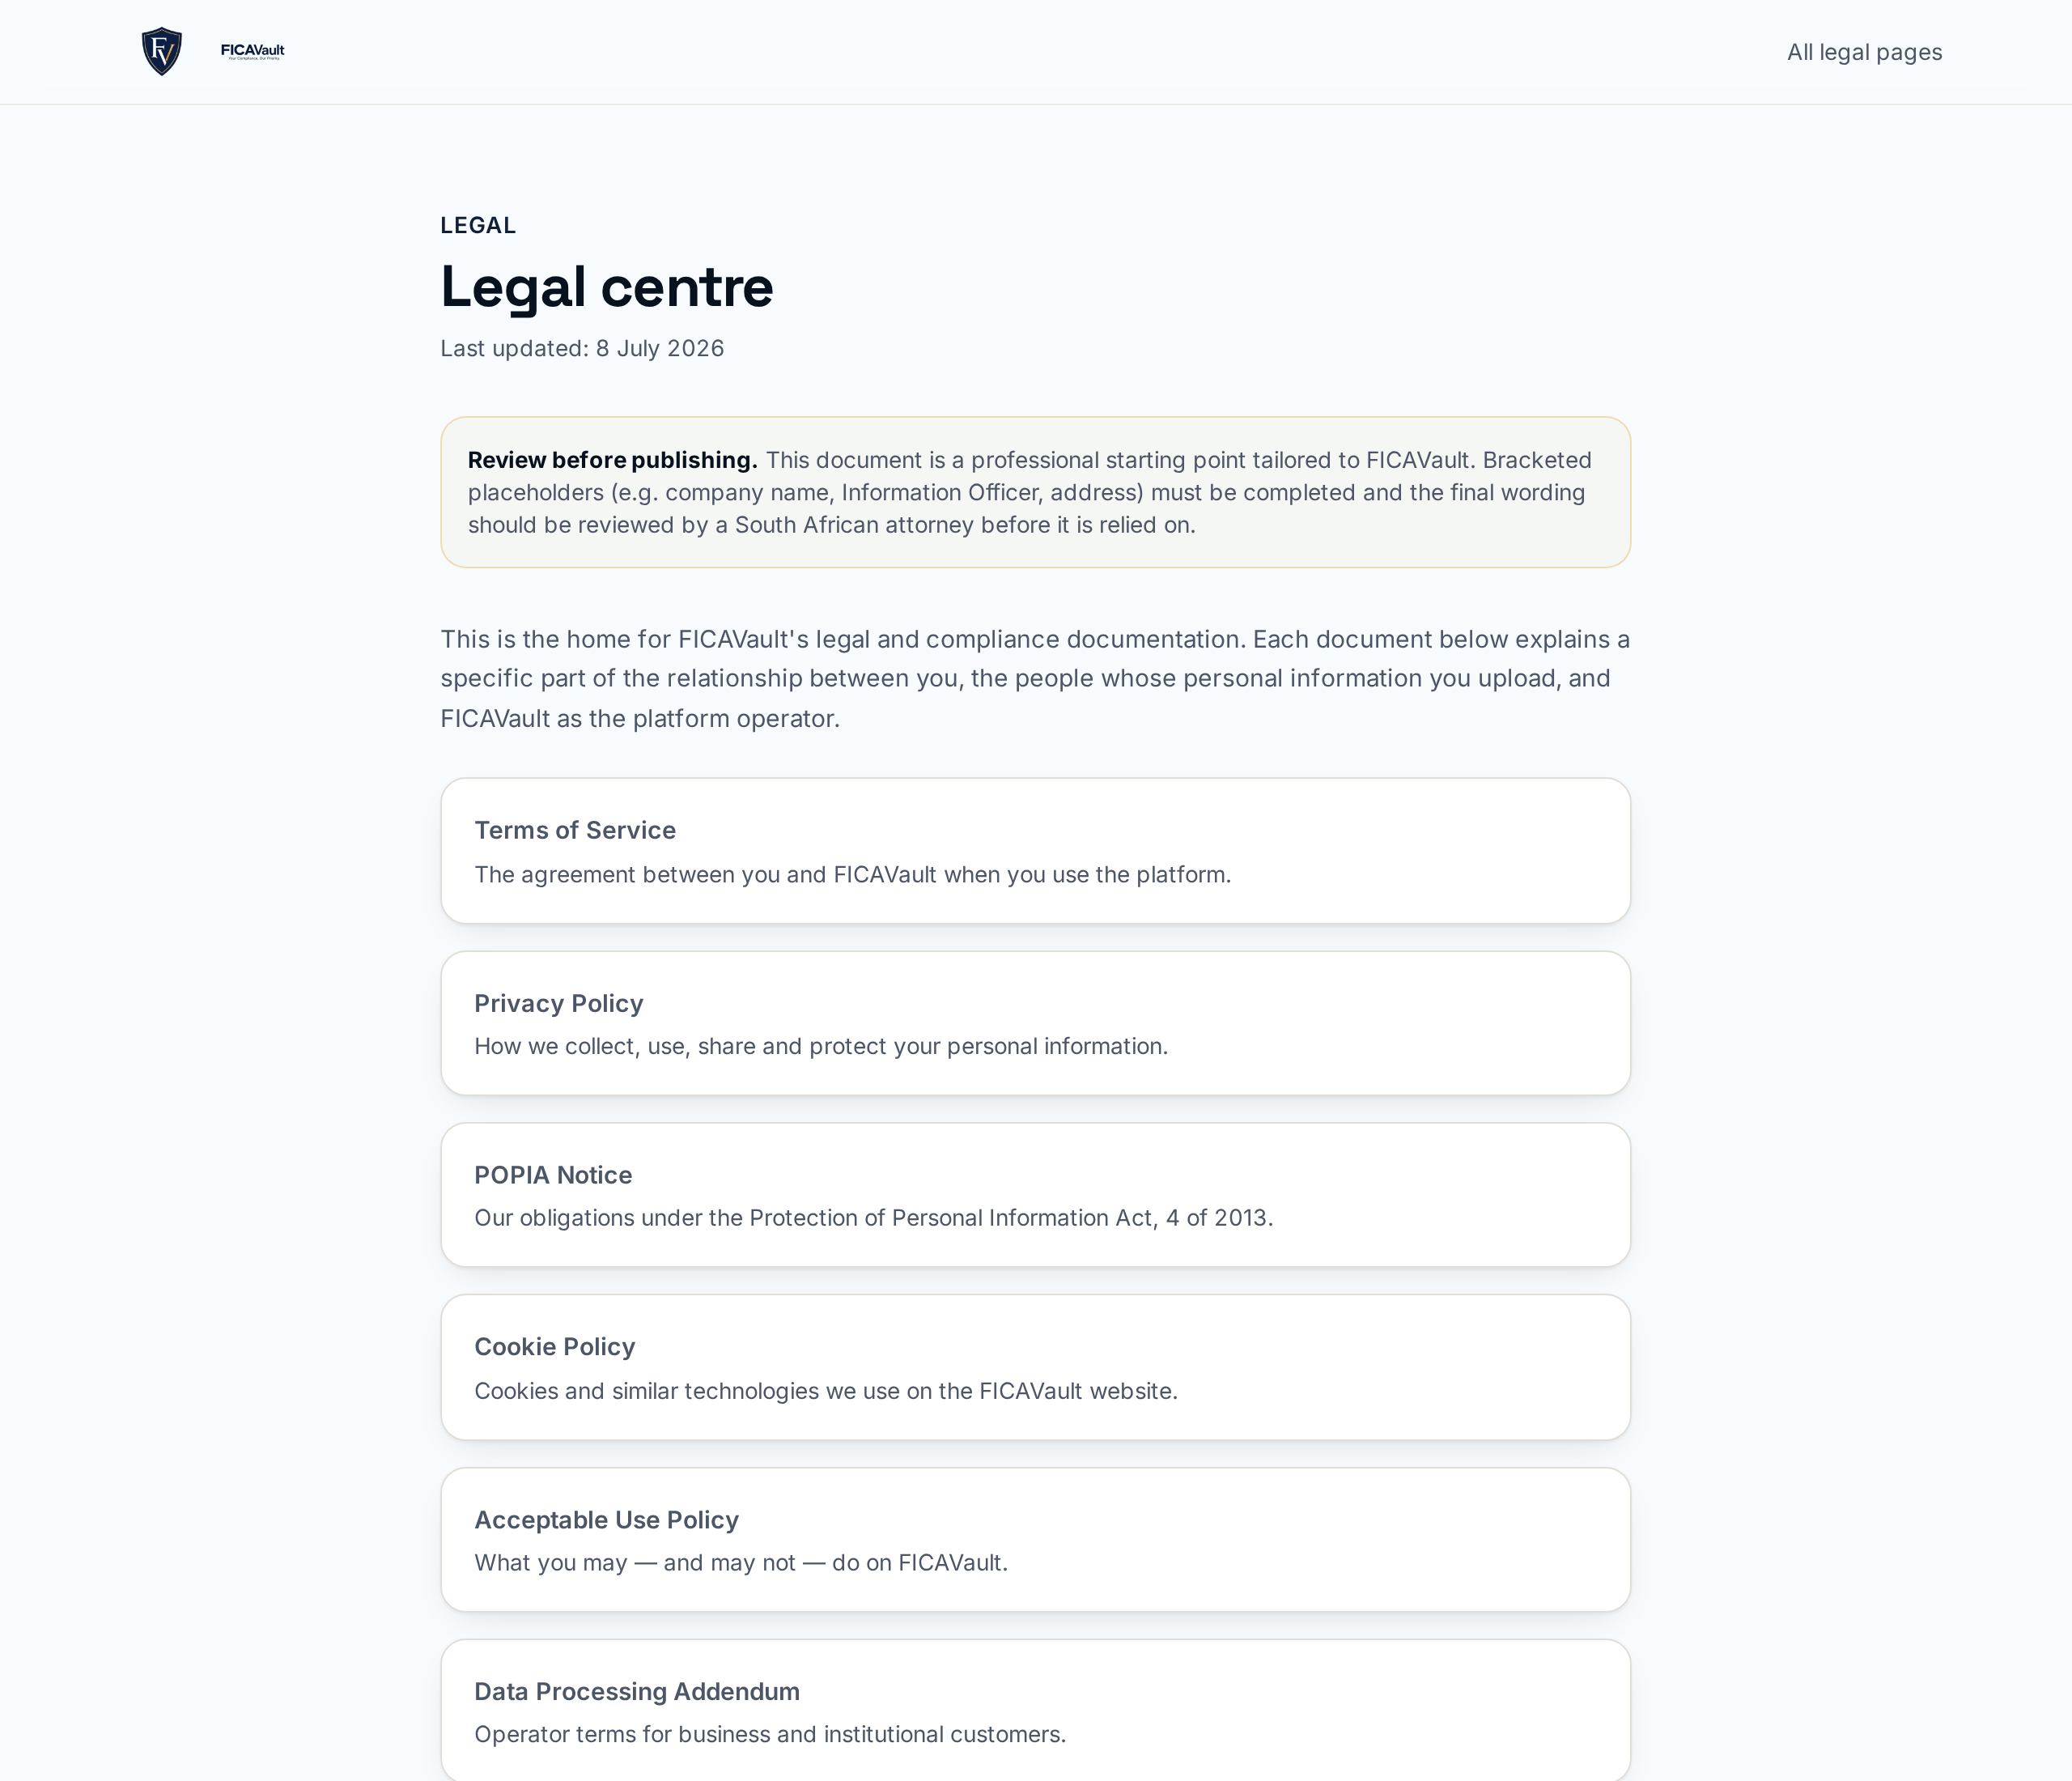
- POPIA-aligned. Read our POPIA Notice, Privacy Policy and, for business customers, the Data Processing Addendum.
16. Notifications & expiry reminders
FICAVault emails you (and optionally SMS on Pro) at these moments:
- A new document request lands.
- An OTP is requested to approve a share.
- 30, 14, 7 and 1 days before any document expires.
- A share link you created is opened, or is about to expire.
- A team member logs in from a new device (Business/Institution).
Fine-tune what you receive under Dashboard → Security → Notifications, or unsubscribe from a specific email using the link in its footer.
17. Two-factor authentication (2FA)
Because your vault holds identity documents, we strongly recommendturning on two-factor authentication. With 2FA on, signing in requires both your password and a six-digit code from an authenticator app (Google Authenticator, 1Password, Authy, Microsoft Authenticator, etc.). A leaked password alone can't open your account.
Turning 2FA on
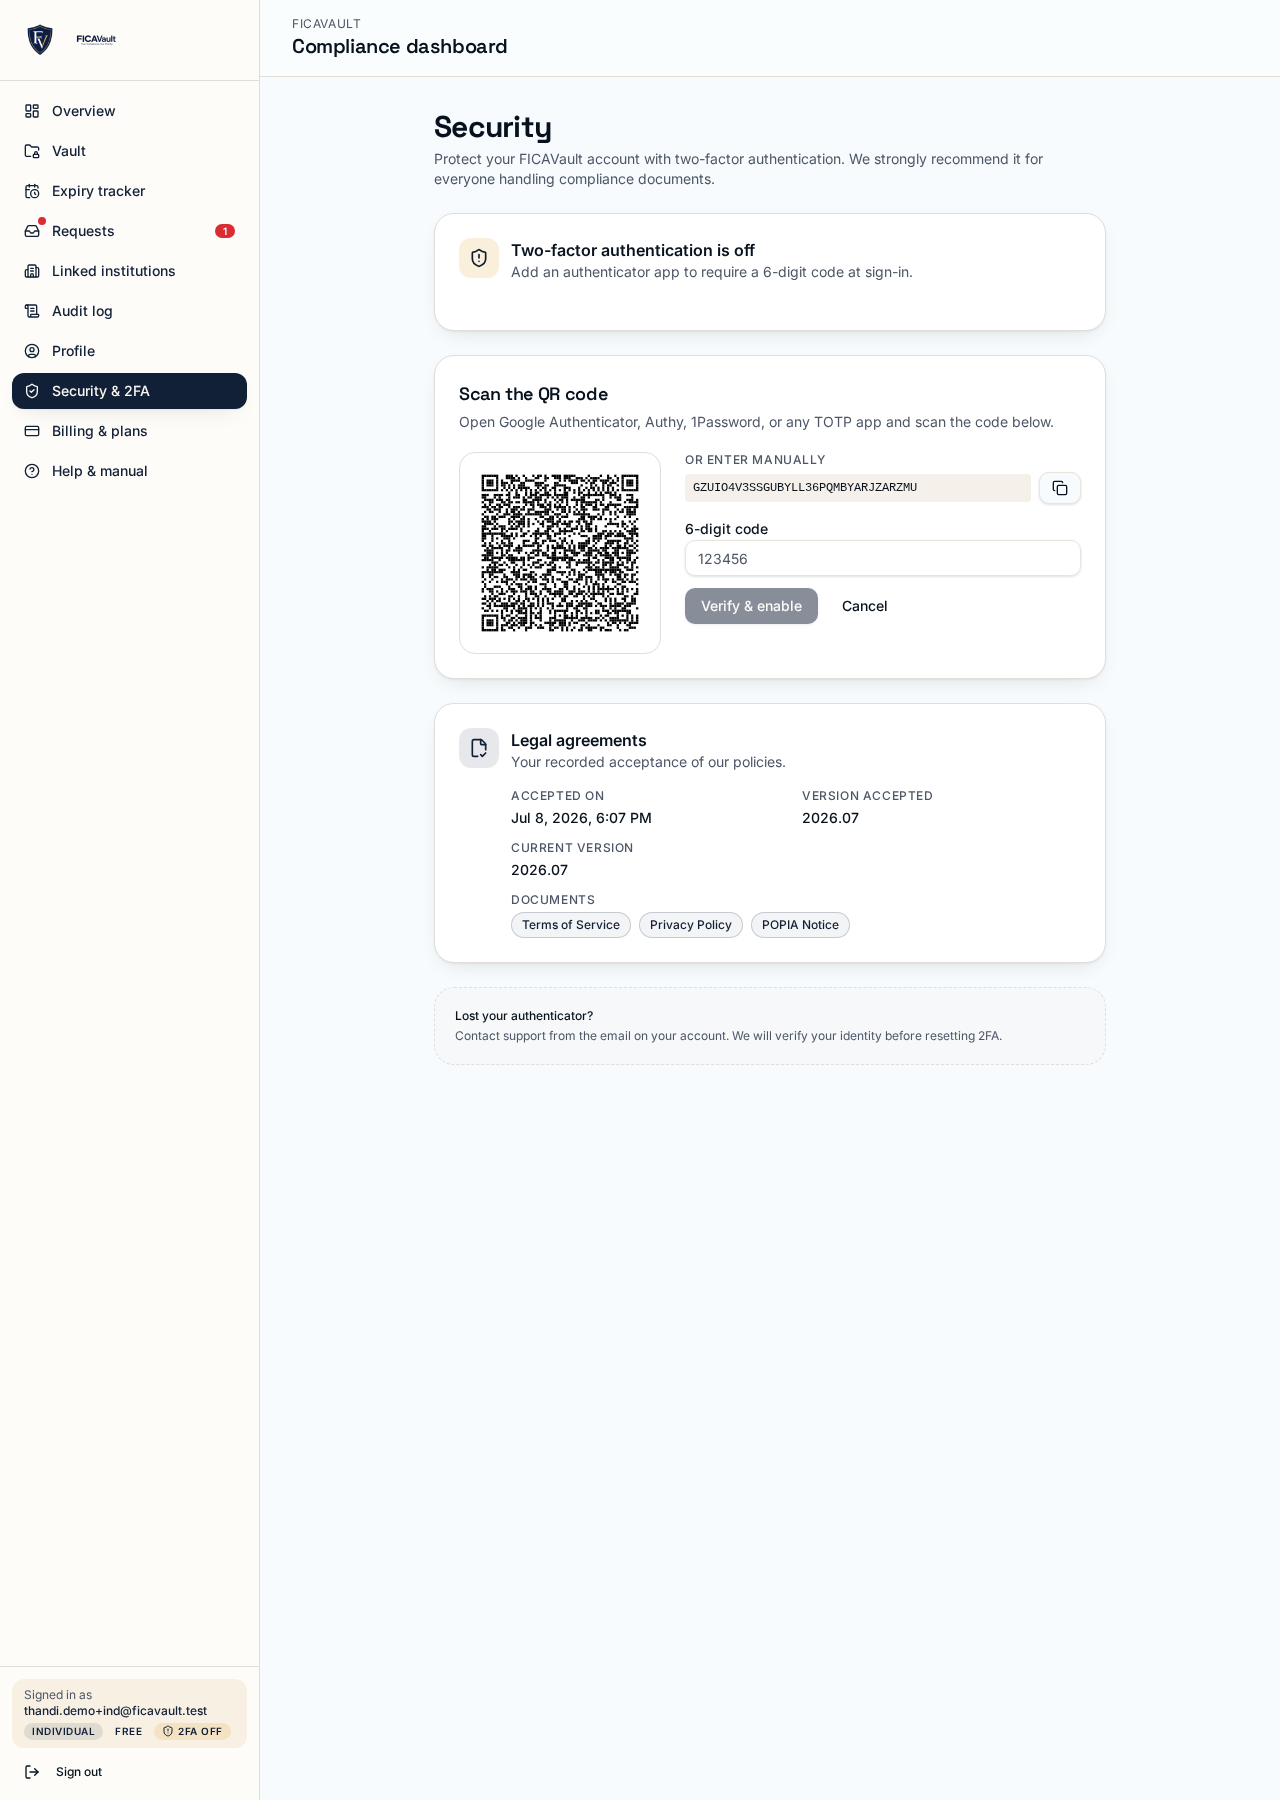
Open Security & 2FA
Sign in and click Security & 2FA in the sidebar.
Add an authenticator
Click Add authenticator. A QR code and a text secret appear. Open your authenticator app, tap Add account, and scan the QR (or paste the secret if scanning isn't possible).
Confirm the six-digit code
Type the current six-digit code from the app back into FICAVault. As soon as it verifies, 2FA is active and you'll see a green Two-factor authentication is oncard. From now on every sign-in asks for a fresh code.
How signing in works with 2FA
- Enter your email and password as usual.
- FICAVault prompts for a 6-digit code.
- Open your authenticator app, read the current code for FICAVault, and enter it.
- You're in. The code changes every 30 seconds, so an old screenshot can't be reused.
Every 2FA event — enrolment, removal, successful and failed code challenge — is written to your audit log (section 14).
18. Security best practice
- Use a unique, long password (13+ characters). Consider a password manager.
- Turn on 2FA (section 17) — it's the single biggest thing you can do to keep your vault safe.
- Keep the mobile number linked to your account current — OTPs go there.
- Review your audit log at least monthly and after any surprising email.
- Revoke share links you're no longer using.
- Institutions: remove leavers from your team the same day, and rotate admin roles regularly.
19. Billing
Every account is free to create and explore. You are only charged when you actively use paid capacity:
- Individual → Pro starts when you switch on notifications, audit export or unlimited share requests (R 49 / month).
- Business starts when you add your first entity (R 100 / month for up to 2 entities; +R 30 per extra entity).
- Institution starts when you link your first client (R 1 499 / month for 25 linked clients; +R 250 per extra block of 25).
Invoices are available under Dashboard → Billing. You can downgrade or cancel at any time; access remains until the paid period ends.
20. Troubleshooting & FAQ
I never got the confirmation email.
Check spam and promotions. Add no-reply@ficavault.app to your contacts. If nothing arrives after 15 minutes, sign in and use 'Resend verification', or contact support.
The OTP isn't arriving on my phone.
Confirm your mobile number under Profile → Contact. Try the email OTP fallback. Some networks delay international-format numbers — allow up to two minutes before requesting a resend.
My 6-digit 2FA code is being rejected.
Codes rotate every 30 seconds — make sure your phone's clock is set to automatic network time. If it still fails, try the next code (wait for it to change) or contact support to reset the factor.
The recipient can't open my share link.
Check they're using the exact email address you entered when creating the link, and the current passcode. If the link is expired, revoked, or the download cap is reached, create a new one.
I want to change my email address.
Dashboard → Security → Change email. You'll be sent a confirmation link at the new address, and a notification at the old one.
Can I approve just some of the documents an institution asked for?
Yes. Deselect items on the approval screen before entering the OTP. Only the ticked documents are unlocked.
How do I close my account?
Dashboard → Security → Close account. You have 30 days to export your documents; after that they are deleted, subject to any legal retention requirement.
21. Getting help
Can't find what you need?
- Email support@ficavault.app for product help.
- Email privacy@ficavault.app for privacy or POPIA requests.
- Email security@ficavault.app to report a security concern.
- See the full legal centre for our terms, privacy, POPIA and DPA documents.